 Global Services
 Use the Users tab to take full control of your department’s learner management, create new users, edit existing profiles, assign roles, bulk upload, download records, and approve training events, all in one place.
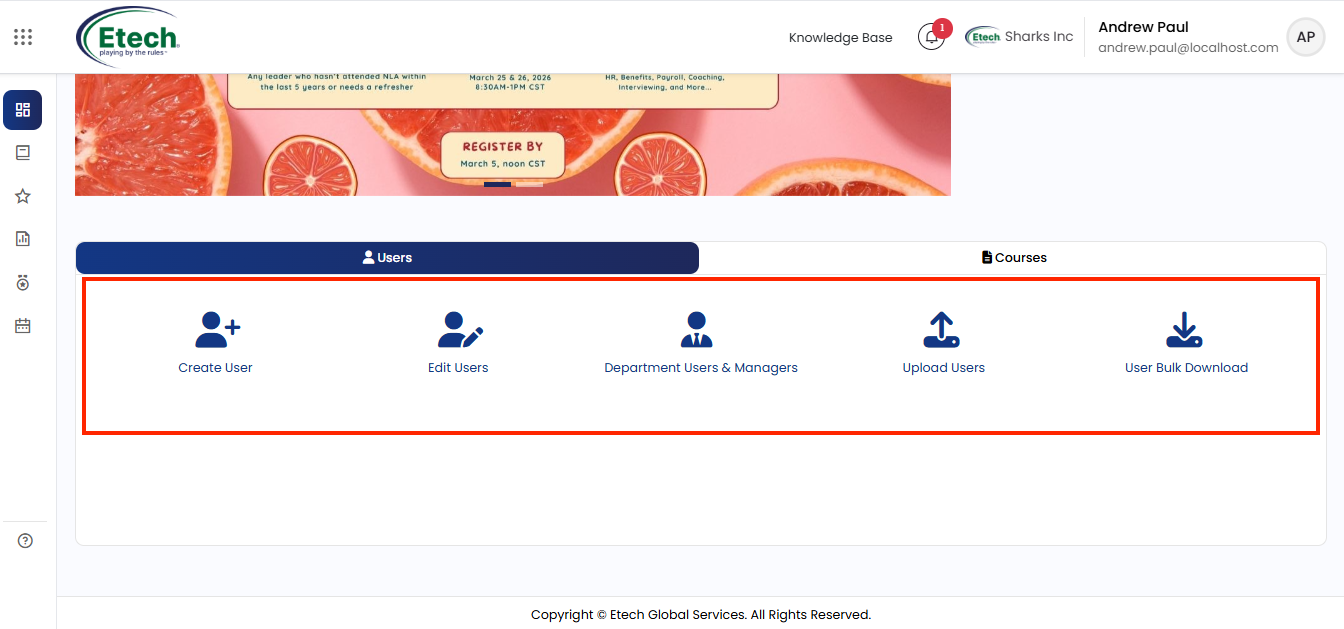
Create User
Use this to add a new user to your company.
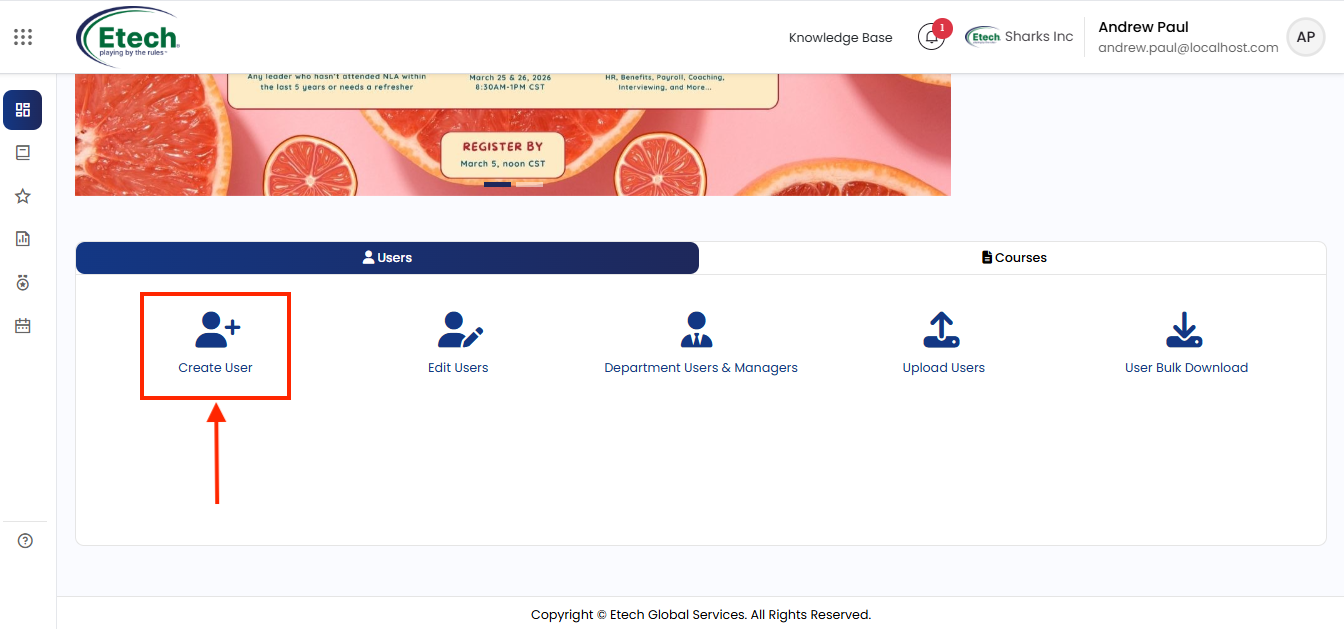
To create a new user, you’ll need to fill in four mandatory fields: Username, First Name, Last Name, and Email Address as shown below. Optionally, you can also select an authentication method from the dropdown to define how the user will log in.
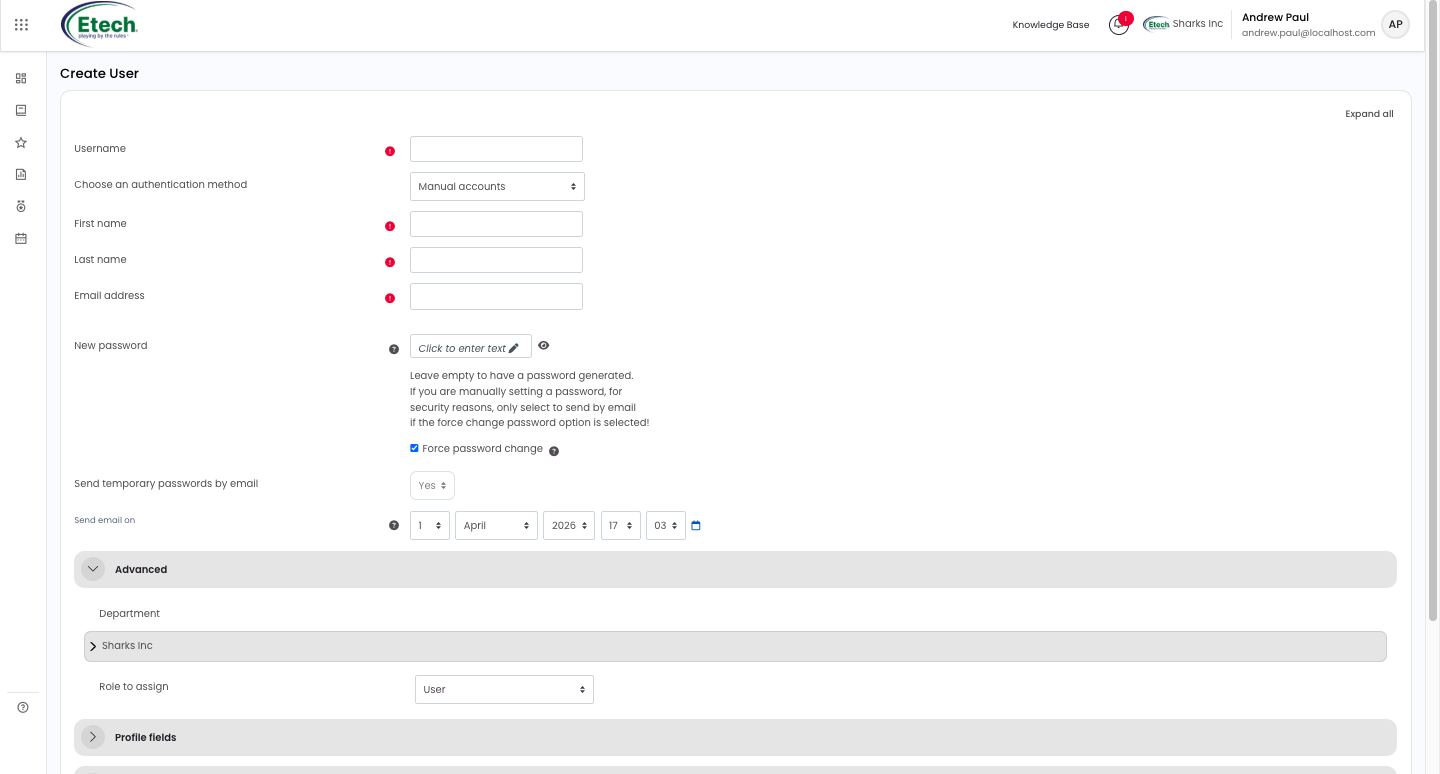
Additional options on the same form:
Password: Leave this field blank to allow the system to generate a password automatically. If you prefer not to set a password manually, enable Force Password Change by selecting the checkbox below. The user will then be prompted to create a new password upon their first login.
Email settings
- Send temporary passwords by email : set to Yes to email login credentials automatically
- Send email on : set the date and time the welcome email should be sent
Advanced section
- Department : select which department the user belongs to (e.g., Sharks Inc or a sub-department)
- Role to assign : default is User; other options include Department Training Manager, Company Manager, etc.
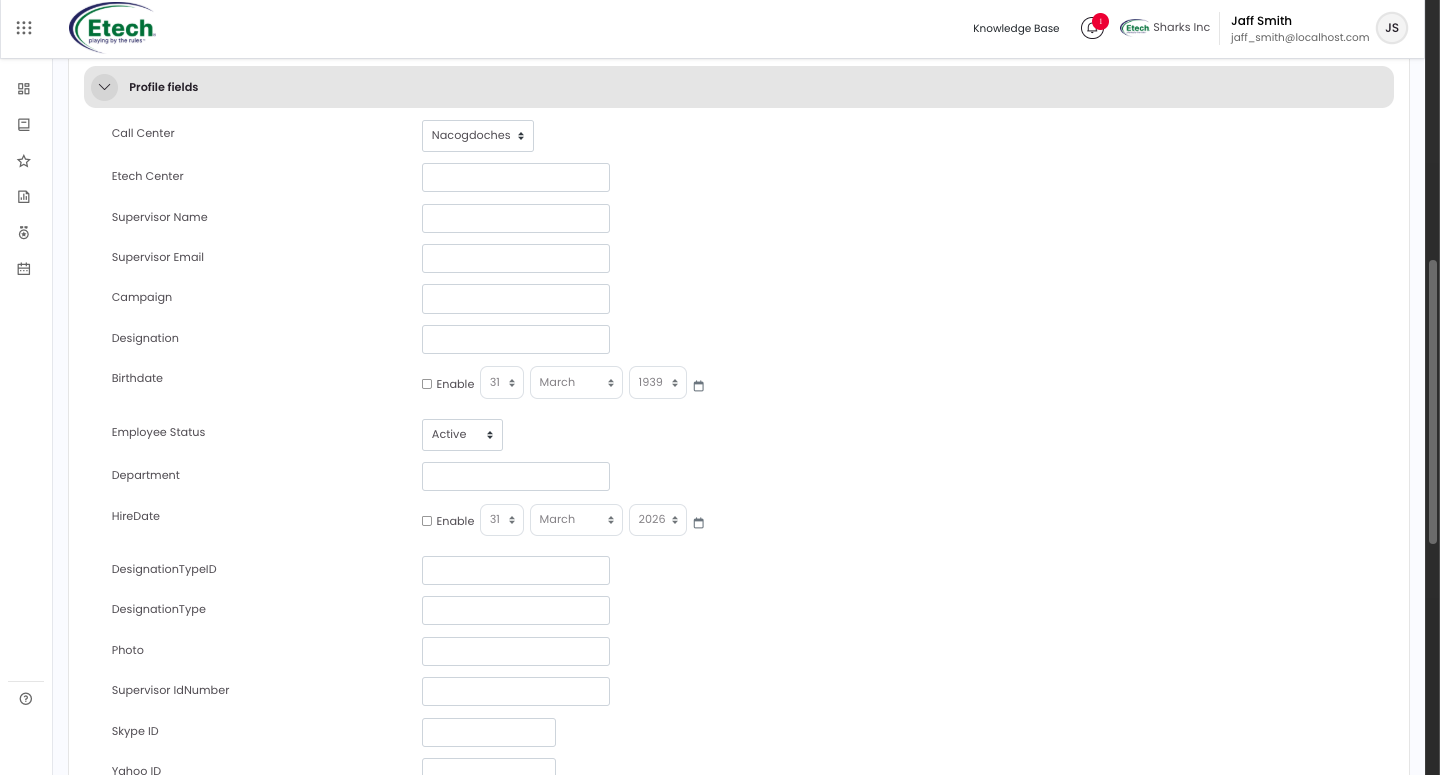
Profile fields (scroll down from Advanced) These are custom fields specific to EtechRU. Fill in as applicable:
- Call Center, Etech Center, Supervisor Name, Supervisor Email, Campaign, Designation
- Birthdate, Employee Status, Department, Hire Date
- DesignationTypeID, DesignationType, Photo, Supervisor IdNumber
- Skype ID, Yahoo ID, Web Page, Start Date, End Date
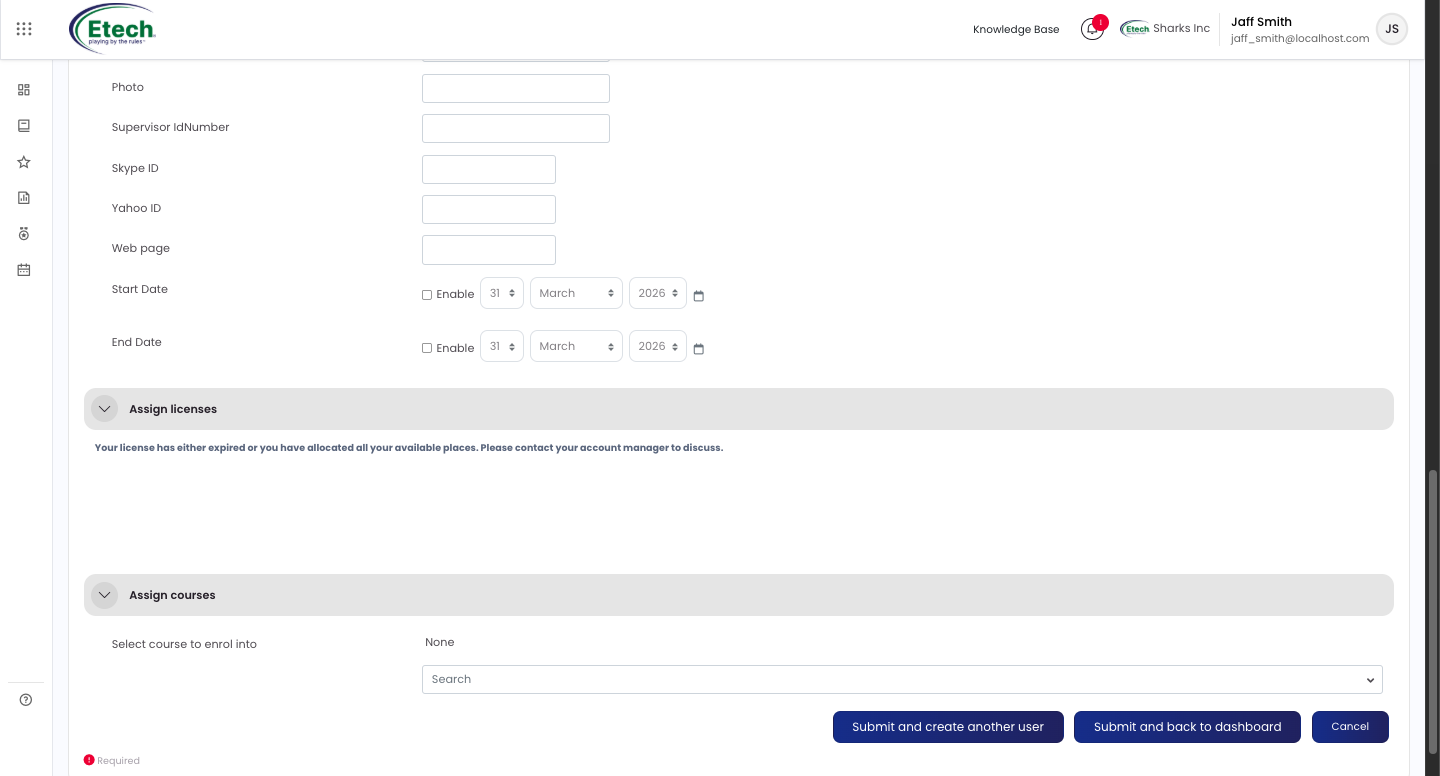
Assign licenses
- If a license is available it will appear here for allocation
- If you see “Your license has either expired or you have allocated all your available places”, contact your account manager before proceeding
Assign courses
- Optionally enroll the user into a course at the point of creation using the Search dropdown
Submission options
- Submit and create another user : saves this user and immediately opens a blank form for the next one
- Submit and back to dashboard : saves and returns you to the main dashboard
- Cancel : discards all entries
Edit Users
Use this to view and manage all existing users in your company.
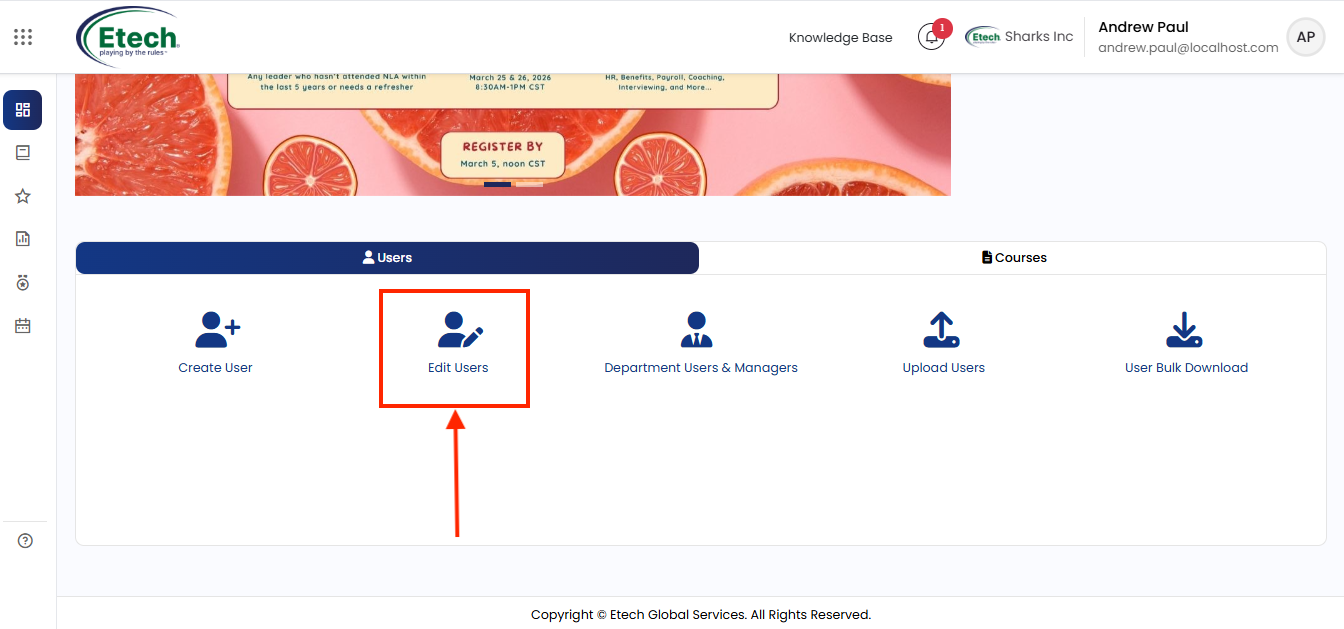
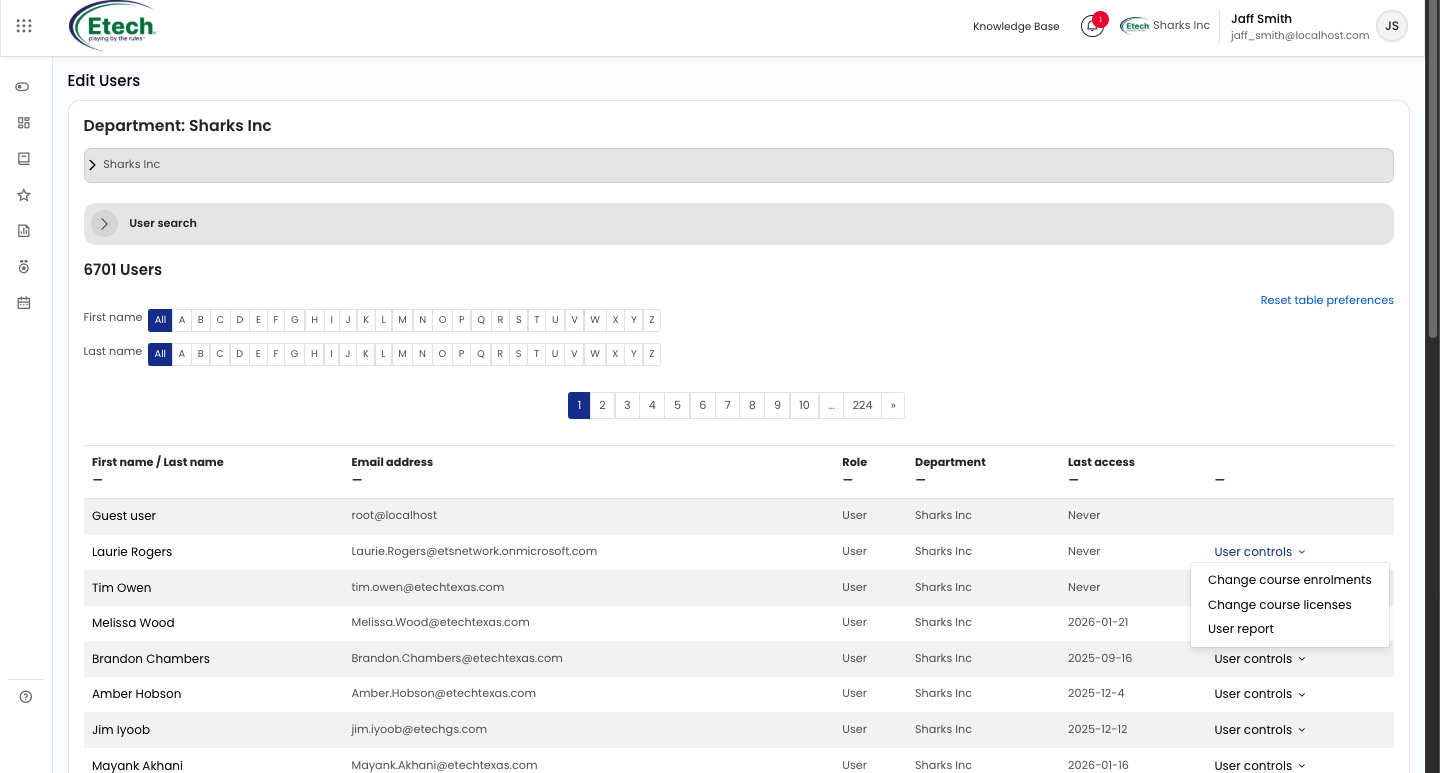
The page shows a list of all users with their name, email address, role, department, and last access date. The list is paginated and can be filtered by first name or last name initial using the A-Z letter filters.
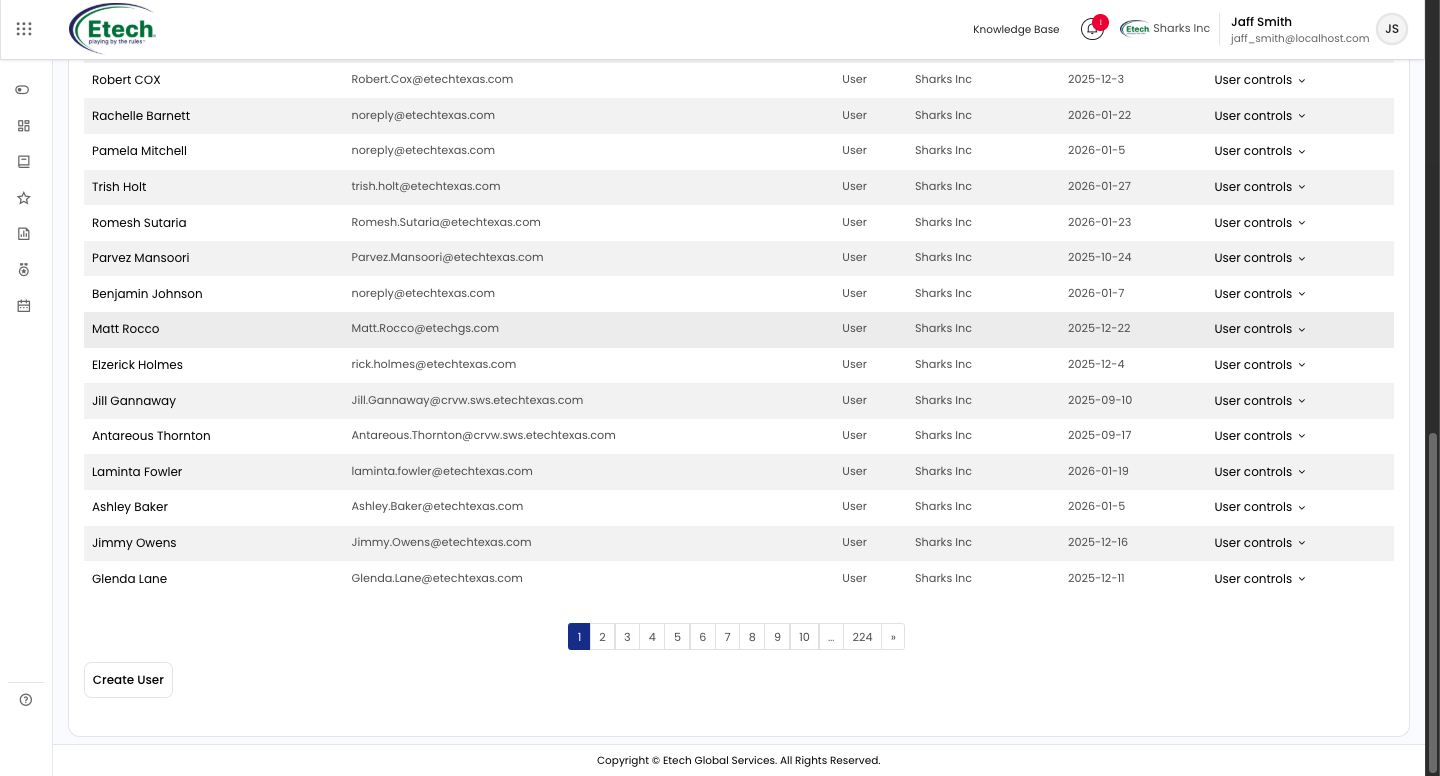
Clicking on the user’s name opens their profile, where detailed information about the user is displayed.
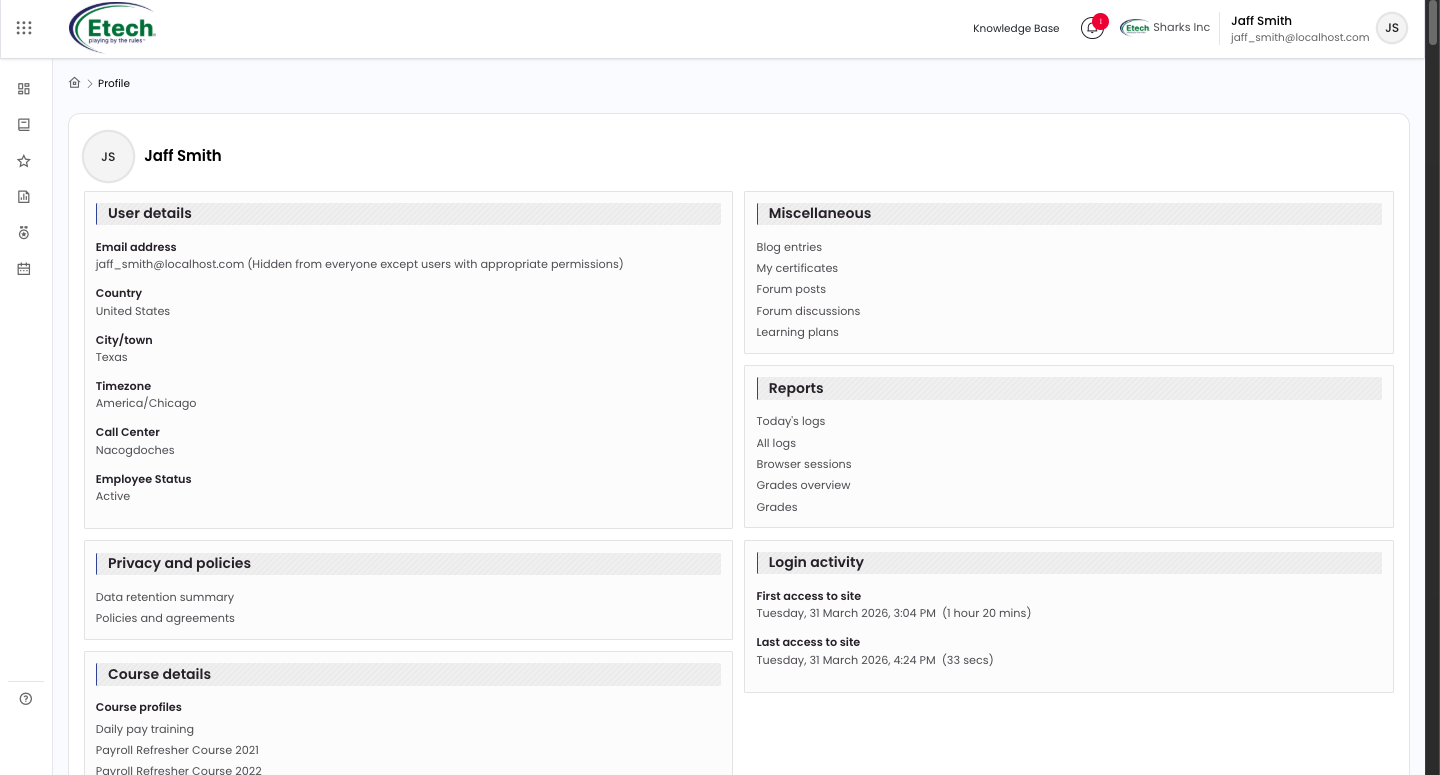
User Controls : click the dropdown next to any user to access three actions:
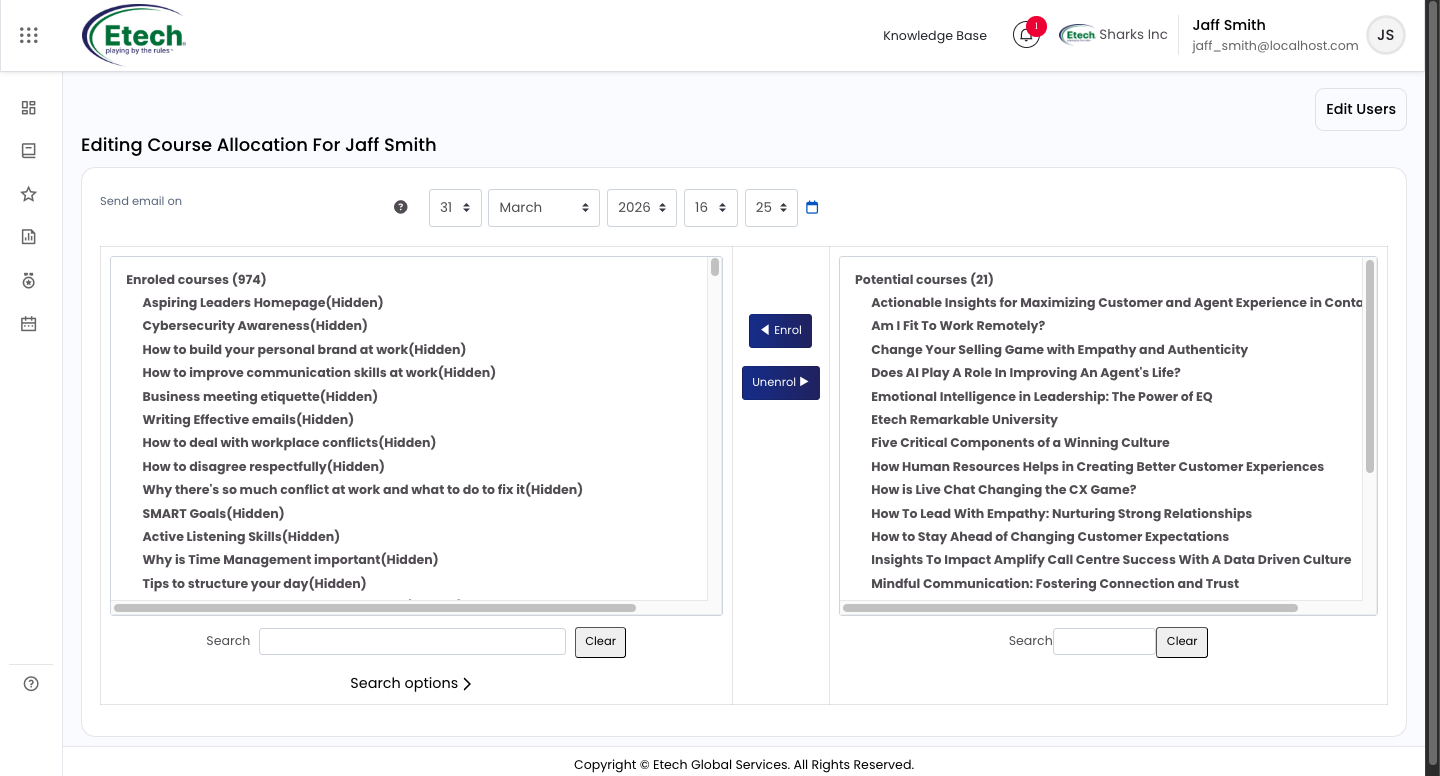
1) Change Course Enrollments :
Opens the course allocation screen for that user. The left panel shows currently enrolled courses and the right panel shows available courses. Select a course from the right and click Enroll to add it, or select from the left and click Unenroll to remove it. You can also set the date the enrollment notification email is sent. Use the Search bar in each panel to find specific courses quickly.
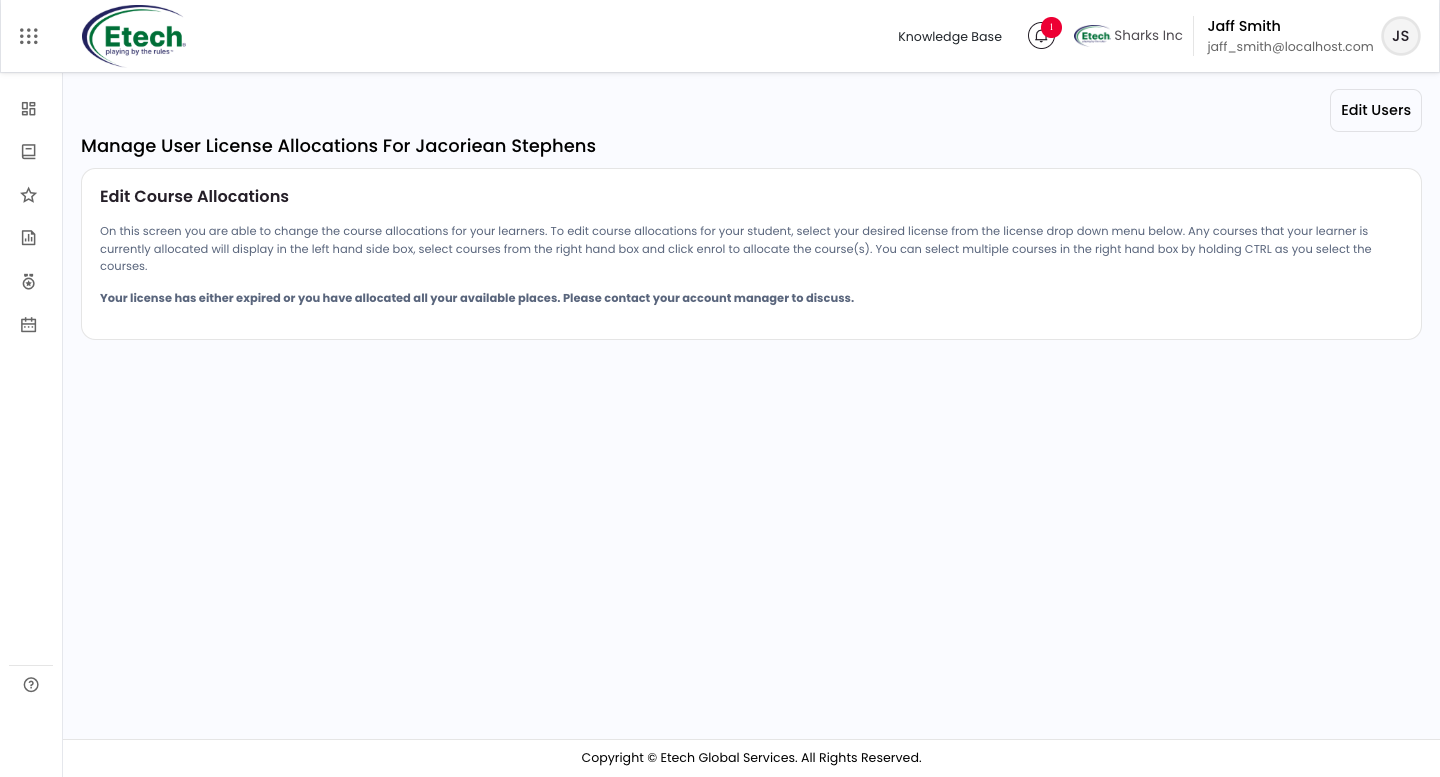
2) Change Course Licenses : opens the license allocation screen for that user. Select your desired license from the dropdown, then move courses from the right panel to the left to allocate them. If you see “Your license has either expired or you have allocated all your available places”, no license is currently available and you will need to contact your account manager.
3) User Report : opens the individual learning report for that user.
The report shows each enrolled course with status, license allocated, date started, date completed, grade, and certificate availability.
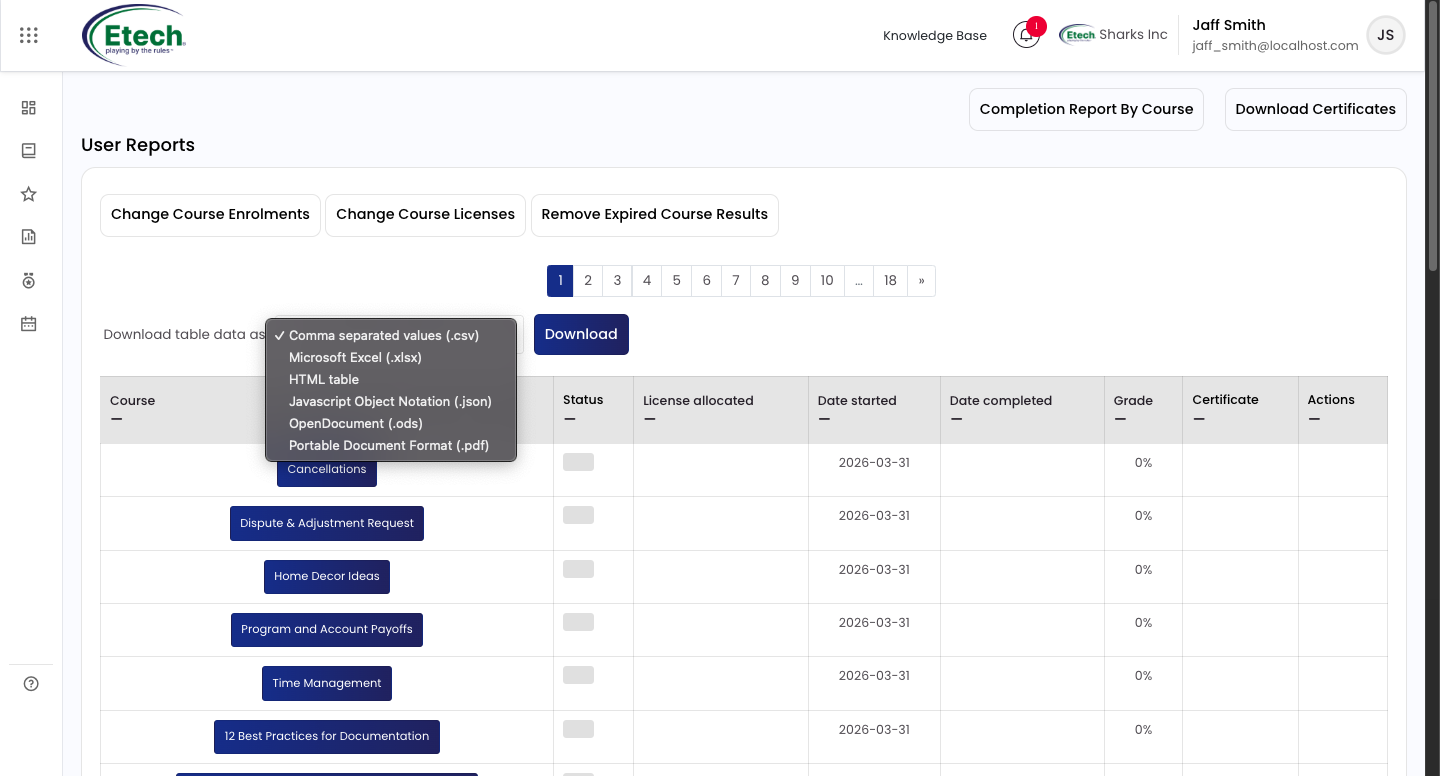
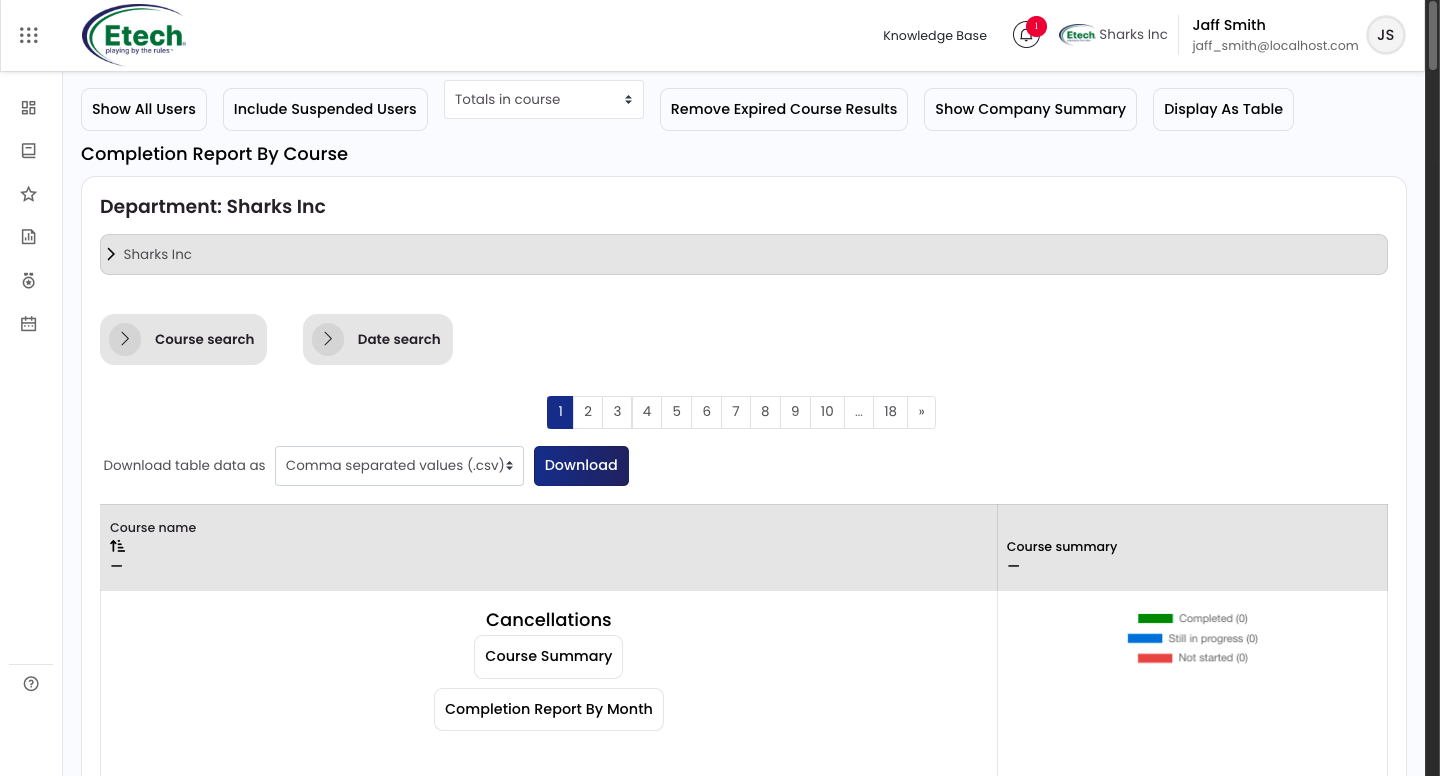
From this screen you can also: Change Course Enrollments, Change Course Licenses, Remove Expired Course Results, view the Completion Report By Course, and Download Certificates. The report data can be downloaded in CSV, Excel (.xlsx), HTML, JSON, ODS, or PDF format.
Completion Report By Course
A Create User button is also available at the bottom of the Edit Users page as a shortcut to create user.
Department Users & Managers
Use this to assign or change a user’s role within a specific department.
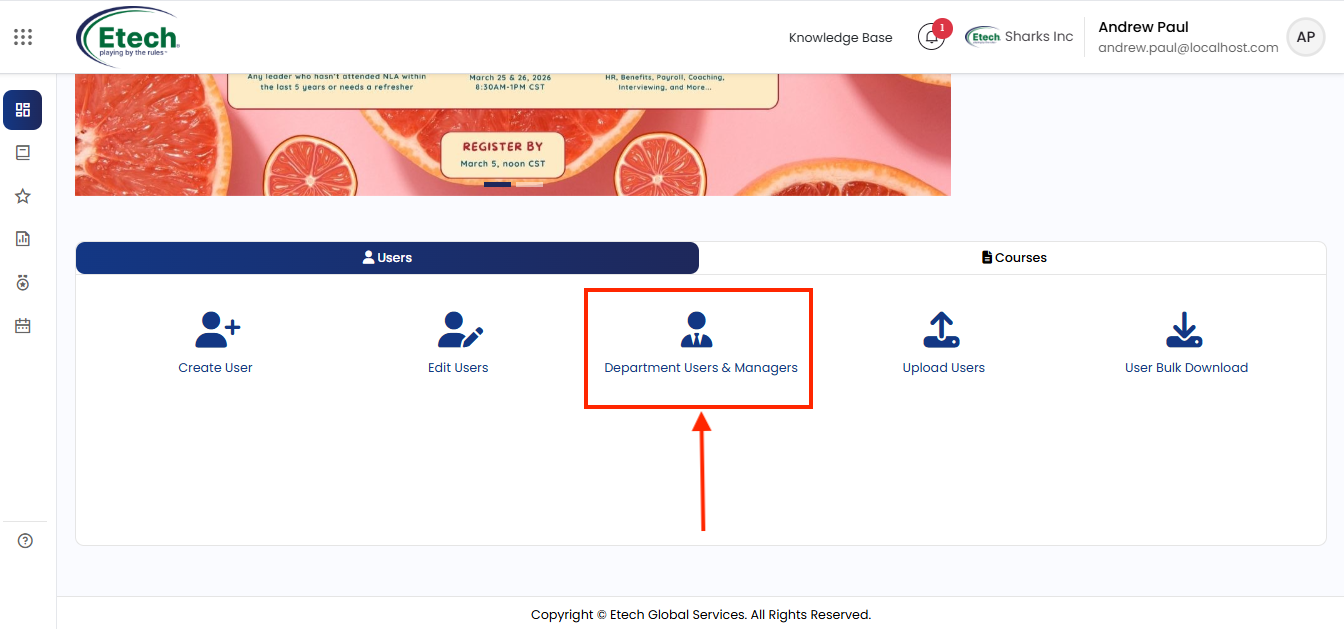
- Select the Role to assign from the dropdown, options include Company Manager, Department Training Manager, User, Company Report Only, etc.
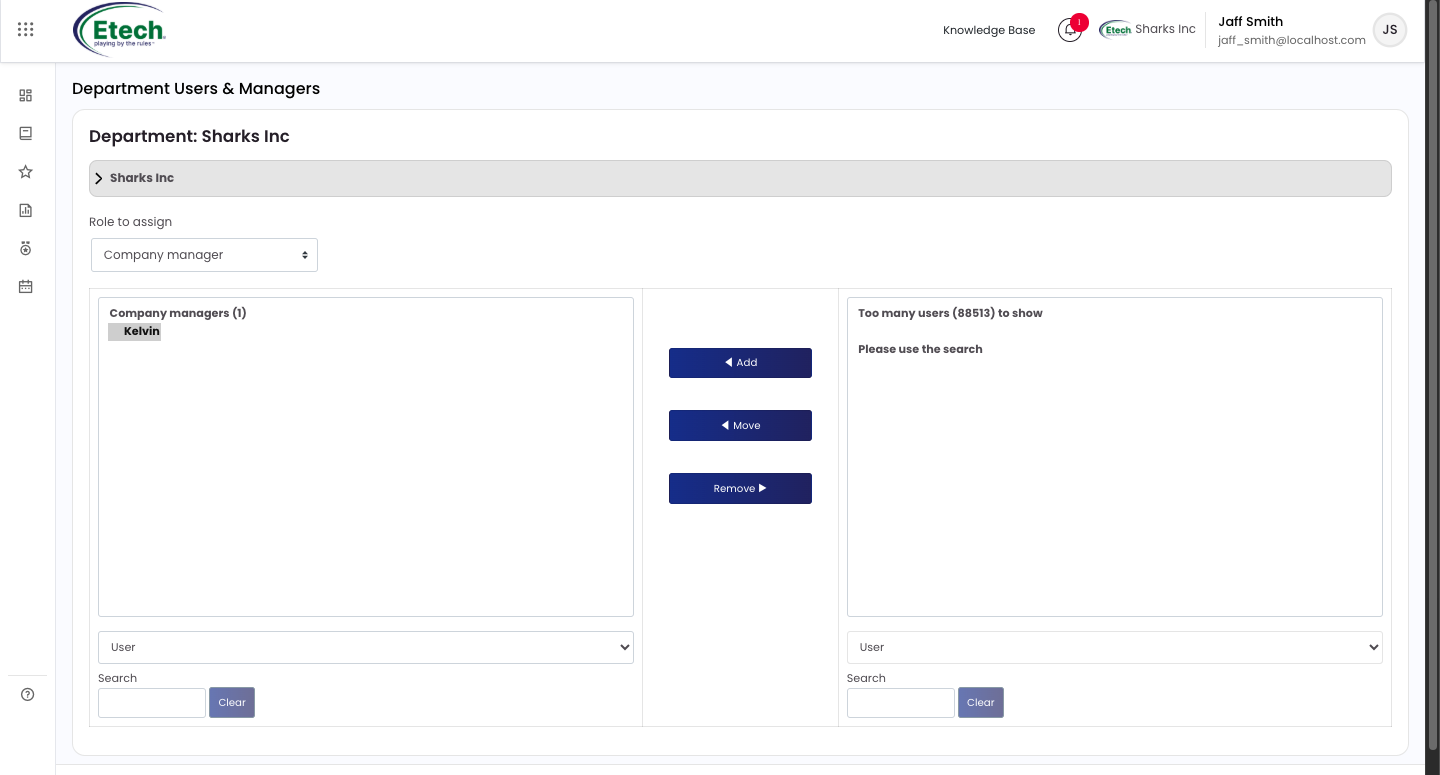
- The left panel shows users currently holding that role
- The right panel shows available users, use the Search bar to find someone when the list is too large to display
- Use Add to assign a user to the selected role
- Use Move to reassign a user from one department to another
- Use Remove to take a user out of the selected role
Upload Users
Use this to add or update multiple users at once using a CSV file.
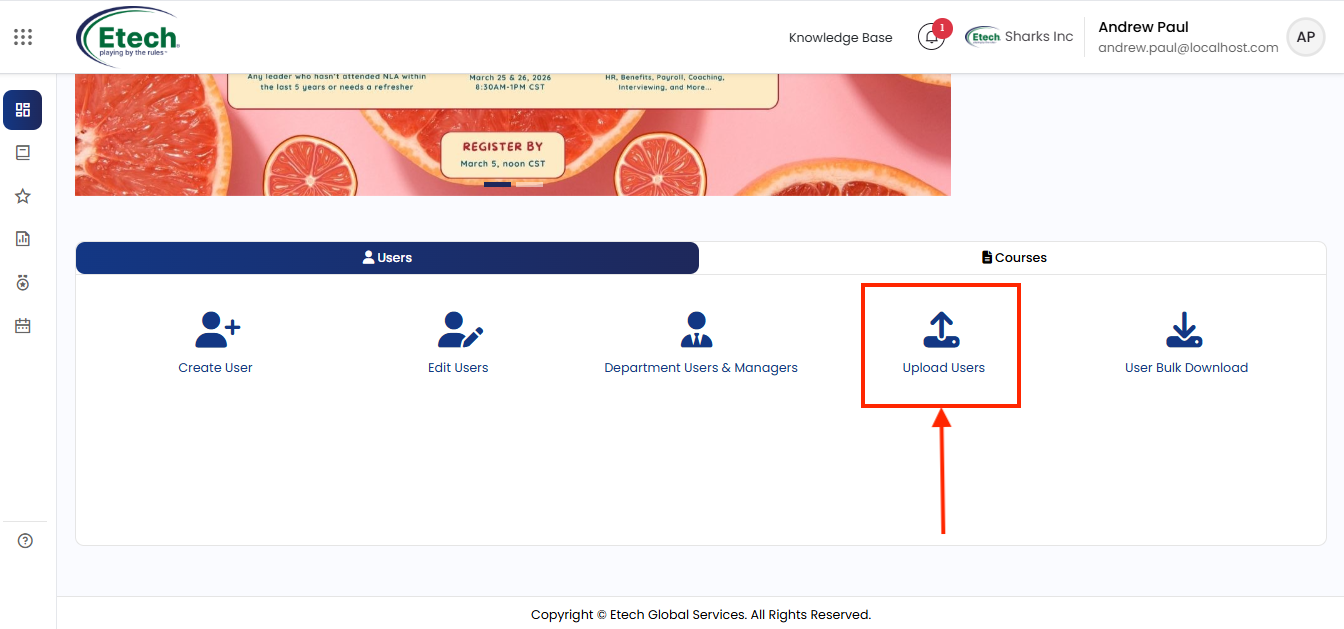
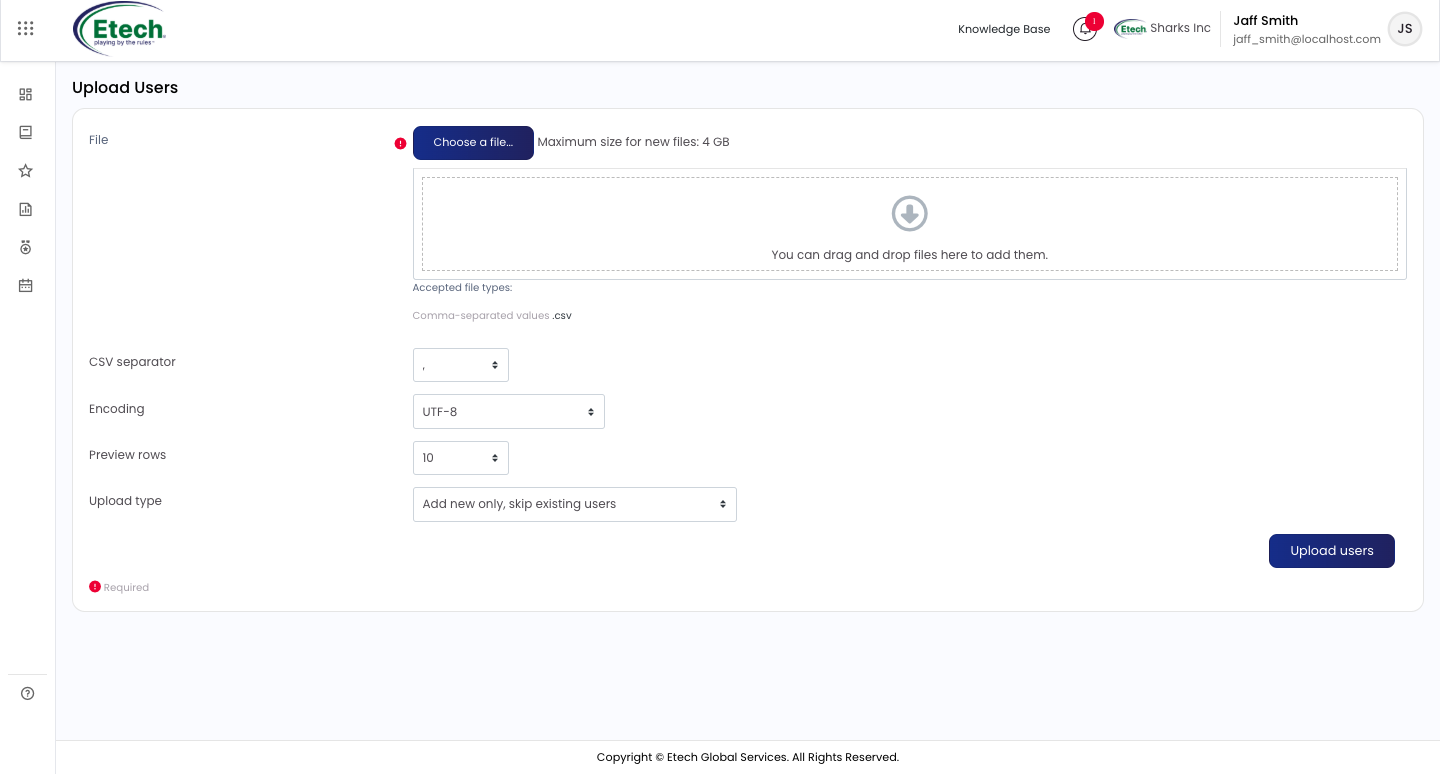
- Click “Choose a file” or drag and drop your CSV into the upload area (maximum file size: 4 GB)
- CSV separator : default is comma; change if your file uses a different delimiter
- Encoding : default is UTF-8
- Preview rows : sets how many rows are shown in the preview before confirming the upload
- Select the Upload type from the dropdown:
- Add new only, skip existing users
- Add all, append number to usernames if needed
- Add new and update existing users
- Update existing users only
Click Upload users to proceed.
User Bulk Download
Use this to export your full user list.
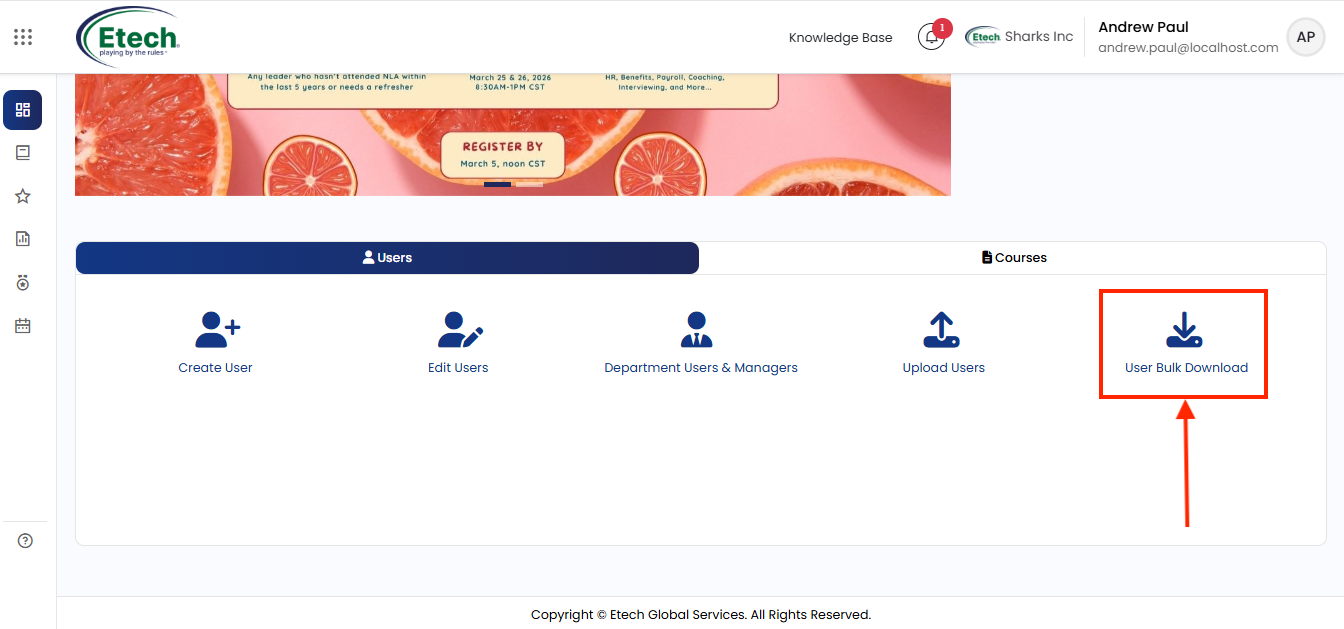
Three format options are available:
- Download in text format
- Download in ODS format
- Download in Excel format
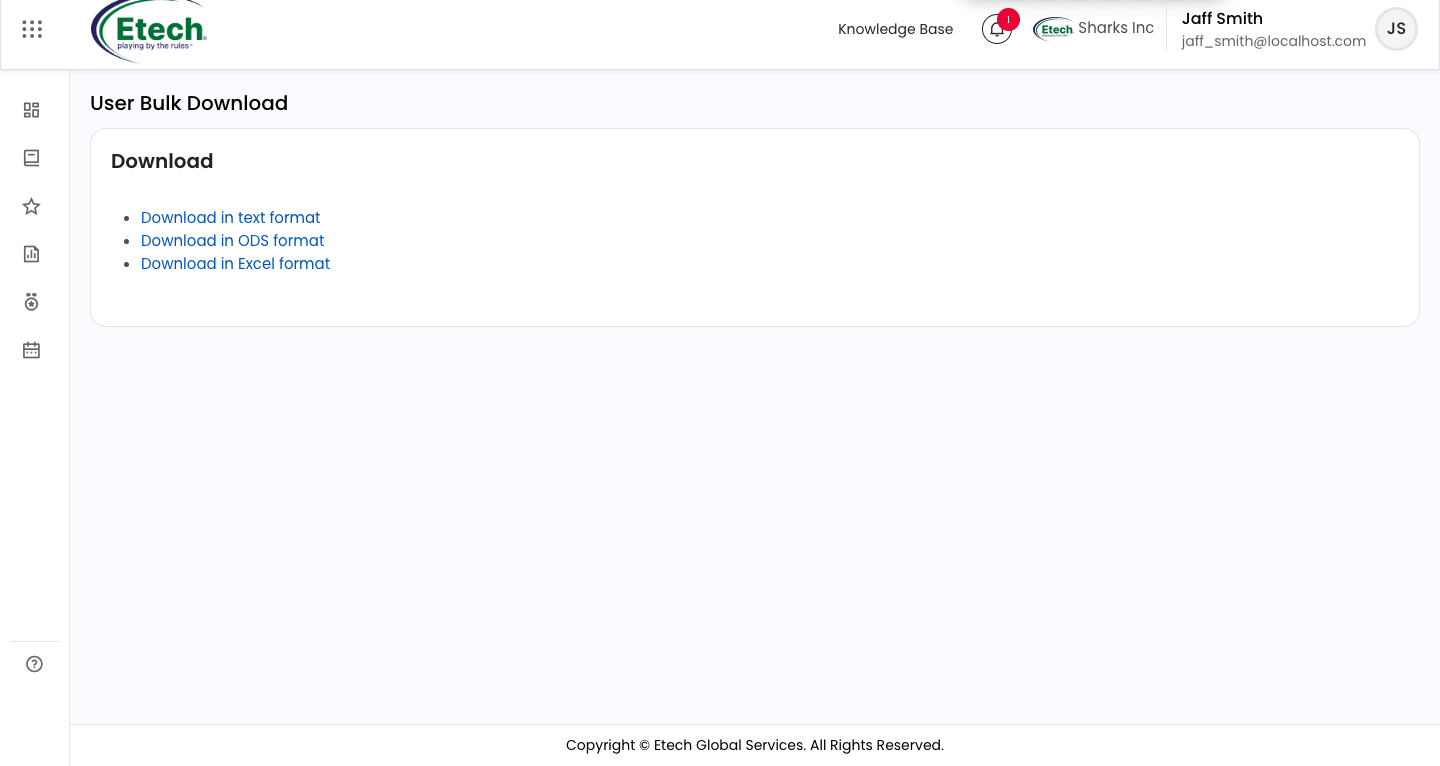
Click the relevant link to download immediately.

Video