 Global Services
 The Courses tab is where you manage course access, learner groupings, and structured learning journeys. It contains four options: User Enrollments, Manage Company Groups, Assign Course Groups, and Learning Paths.
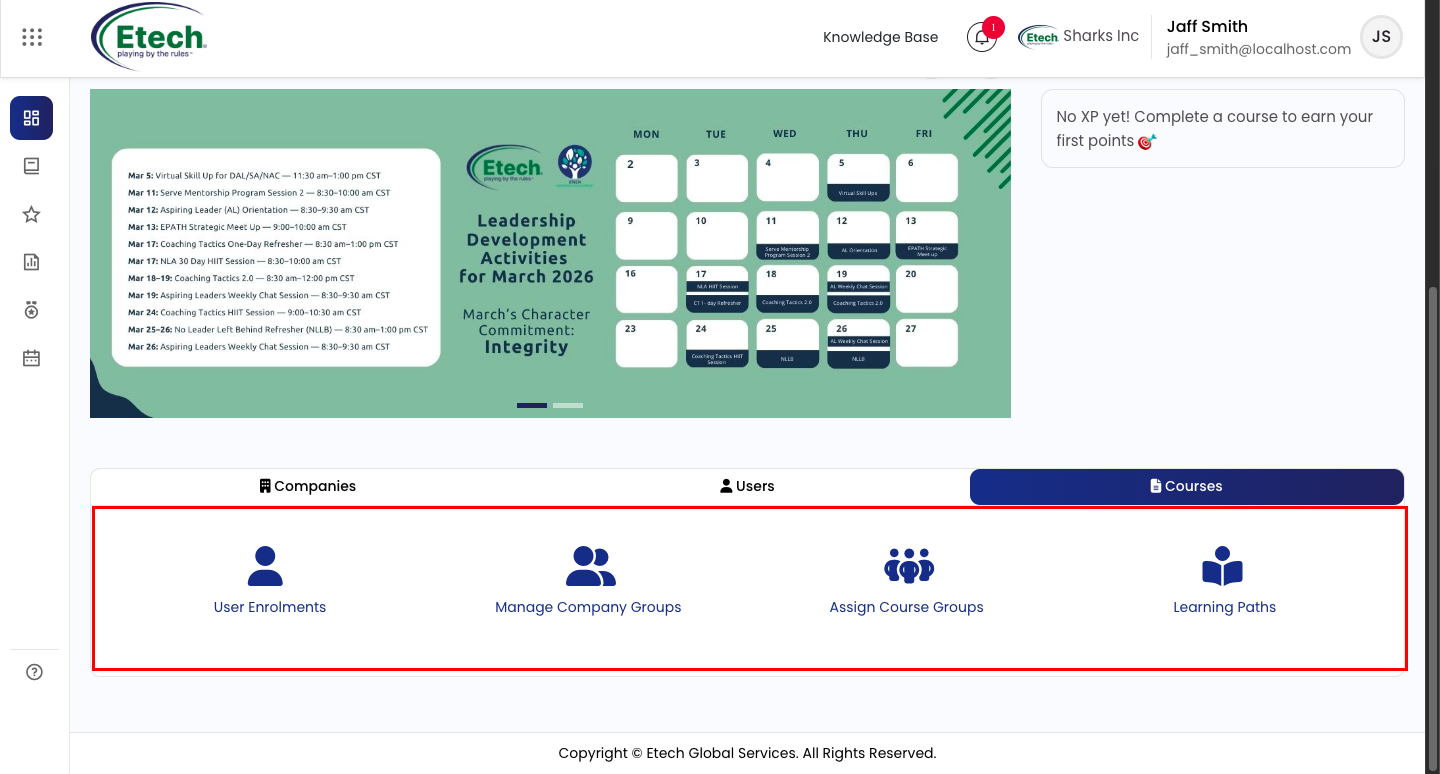
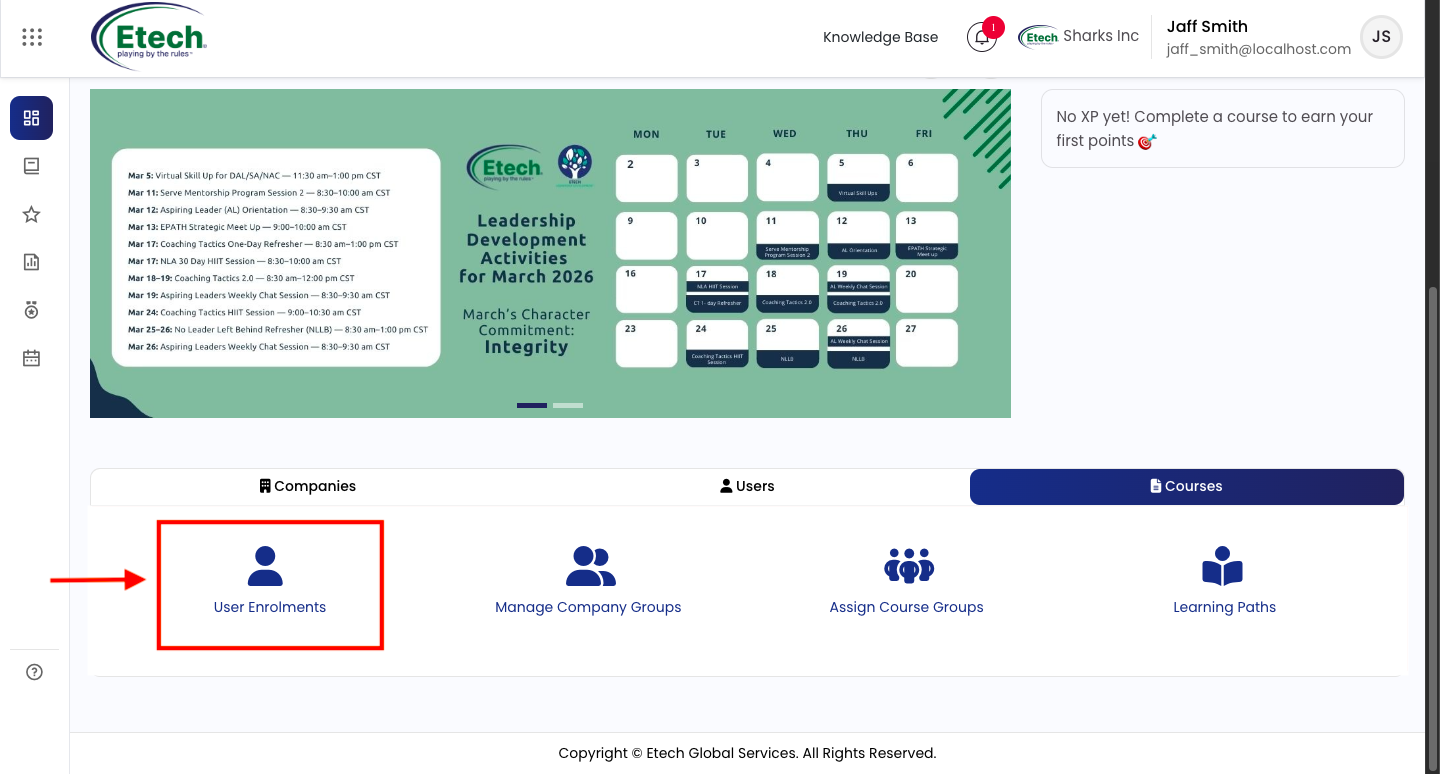
User Enrollments
Use this to enroll or unenroll users from courses across your company.
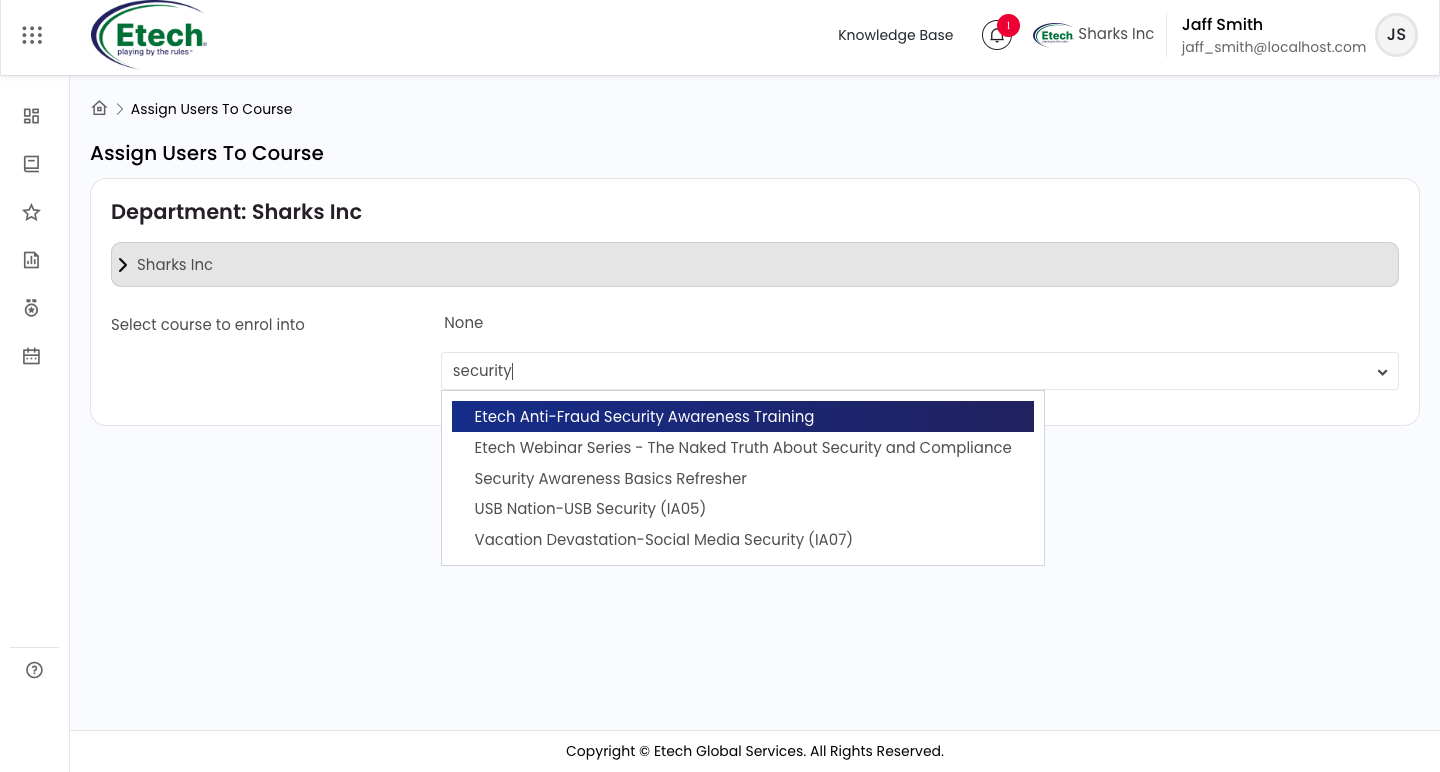
Selecting a course
- Under the department tree (e.g., Sharks Inc), use the Select course to enroll into field
- Type a keyword in the search box to filter available courses (e.g., typing “security” will return all security-related courses)
- Click on the course name to select it, it will appear as a tag above the search box
Once a course is selected, the enrollment panel loads showing:
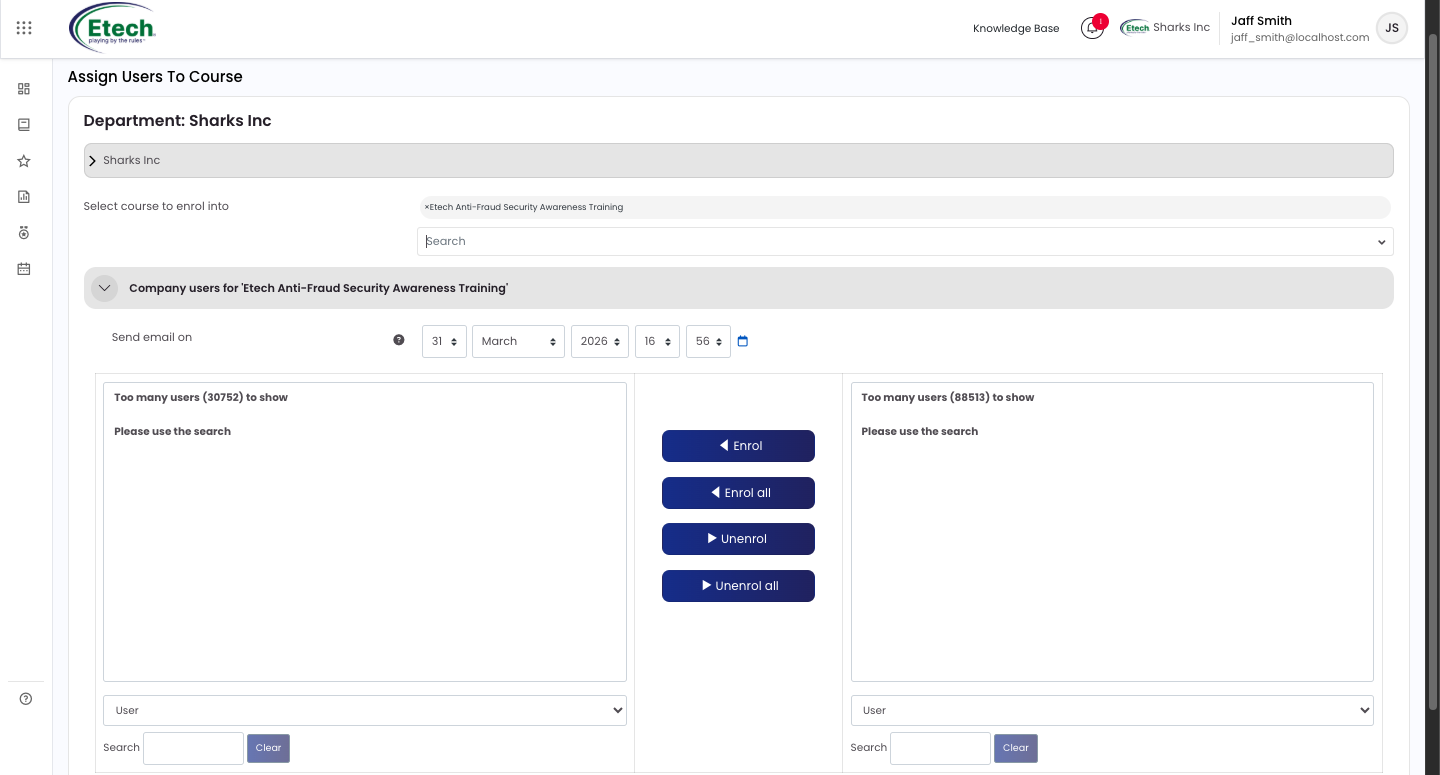
- Left panel : users already enrolled in the course
- Right panel : users available to enroll
- Both panels display a search bar for finding specific users when the list is too large to show
Send email on : set the date and time the enrollment notification email will be sent to users
Action buttons:
- Enroll : enrolls the selected user(s) from the right panel into the course
- Enroll all : enrolls every user in the right panel into the course at once
- Unenroll : removes the selected user(s) in the left panel from the course
- Unenroll all : removes all currently enrolled users from the course at once
Use Enroll all and Unenroll all with caution, these actions affect every visible user in the panel.
Manage Company Groups
Use this to create and manage groups that organize users within a specific course.
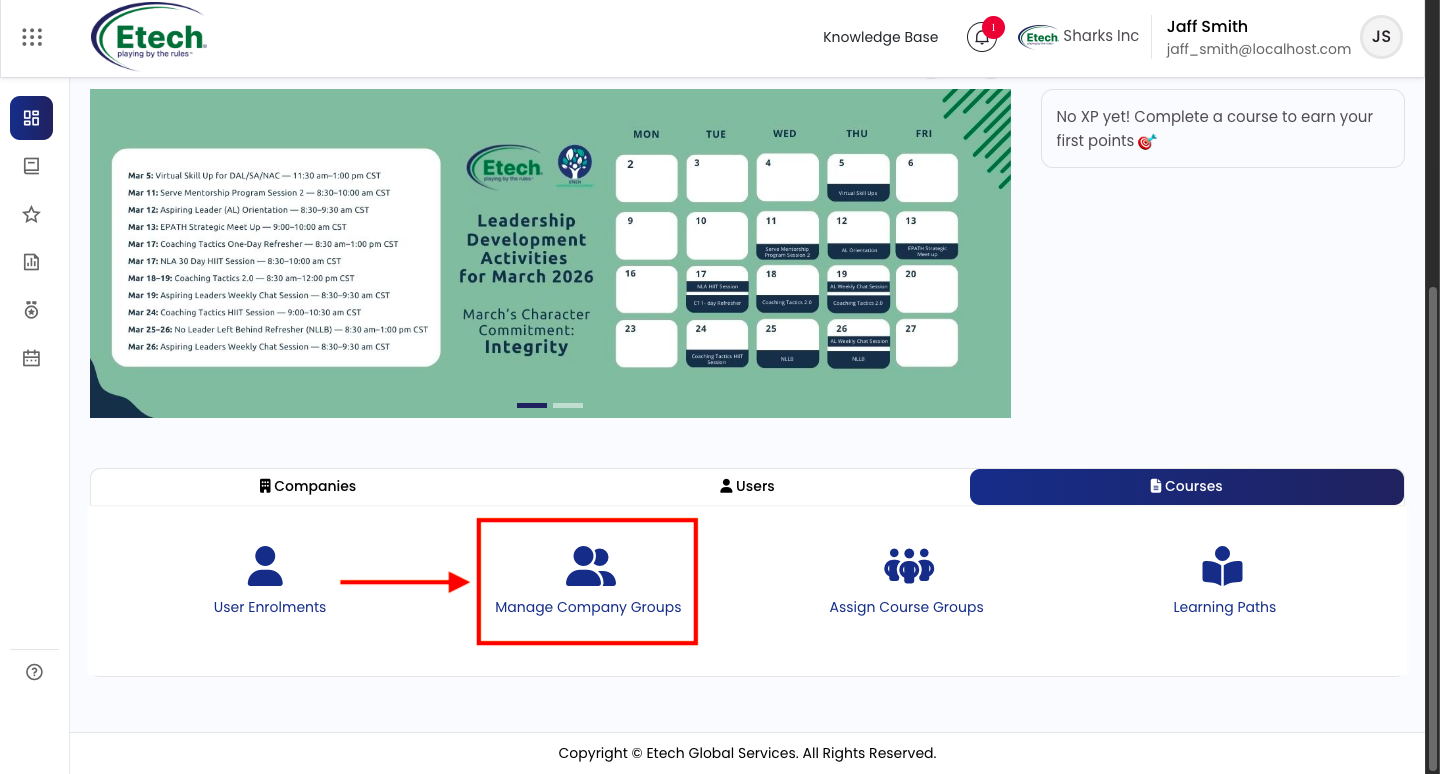
Selecting a course
- Use the Select course field and search for the course you want to manage groups for
- Once selected, the existing groups for your company will appear listed below (e.g., Course group for EtechRU, Course group for Sharks Inc)
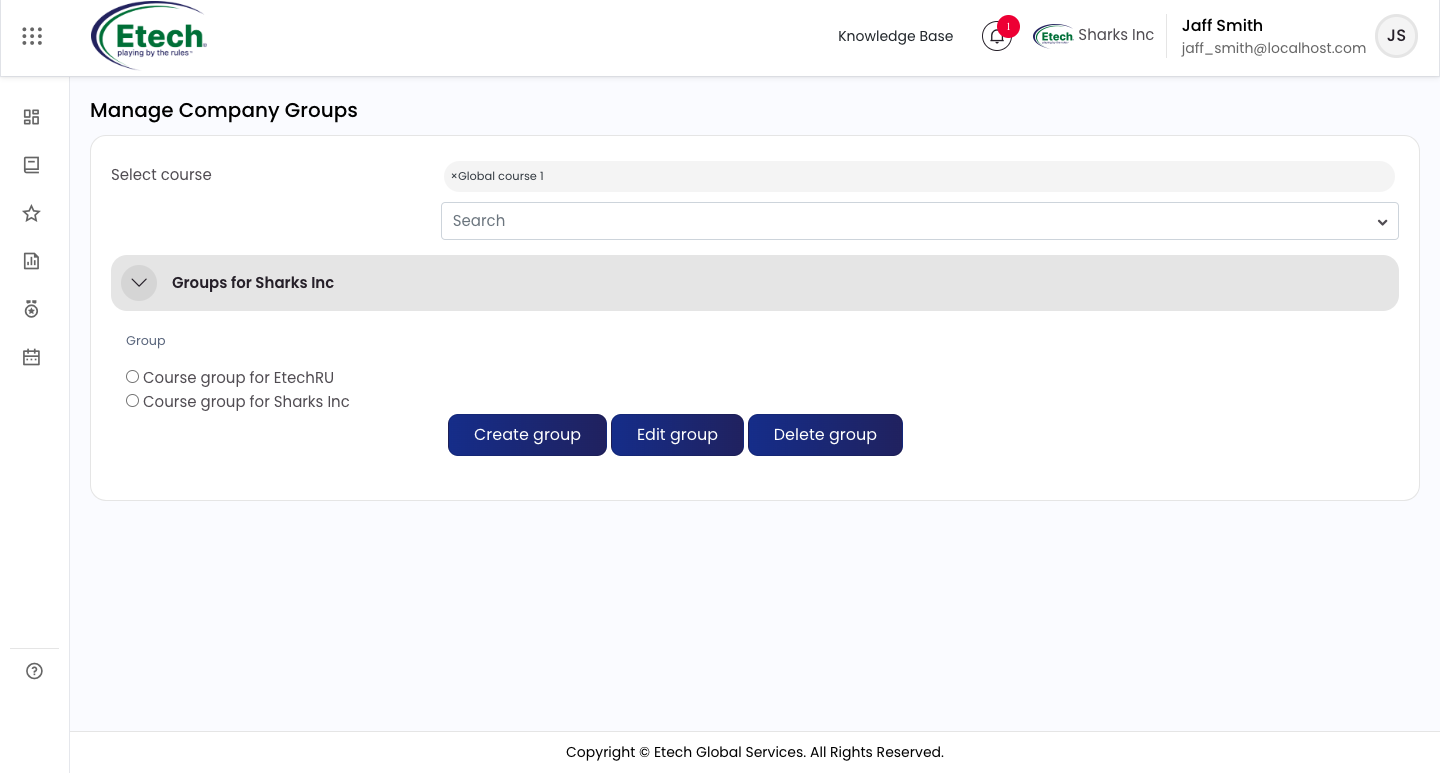
Actions available:
- Create group : opens a form with a single required field: Group name. Enter the name (e.g., “Course group for Sharks Inc”) and click Save changes
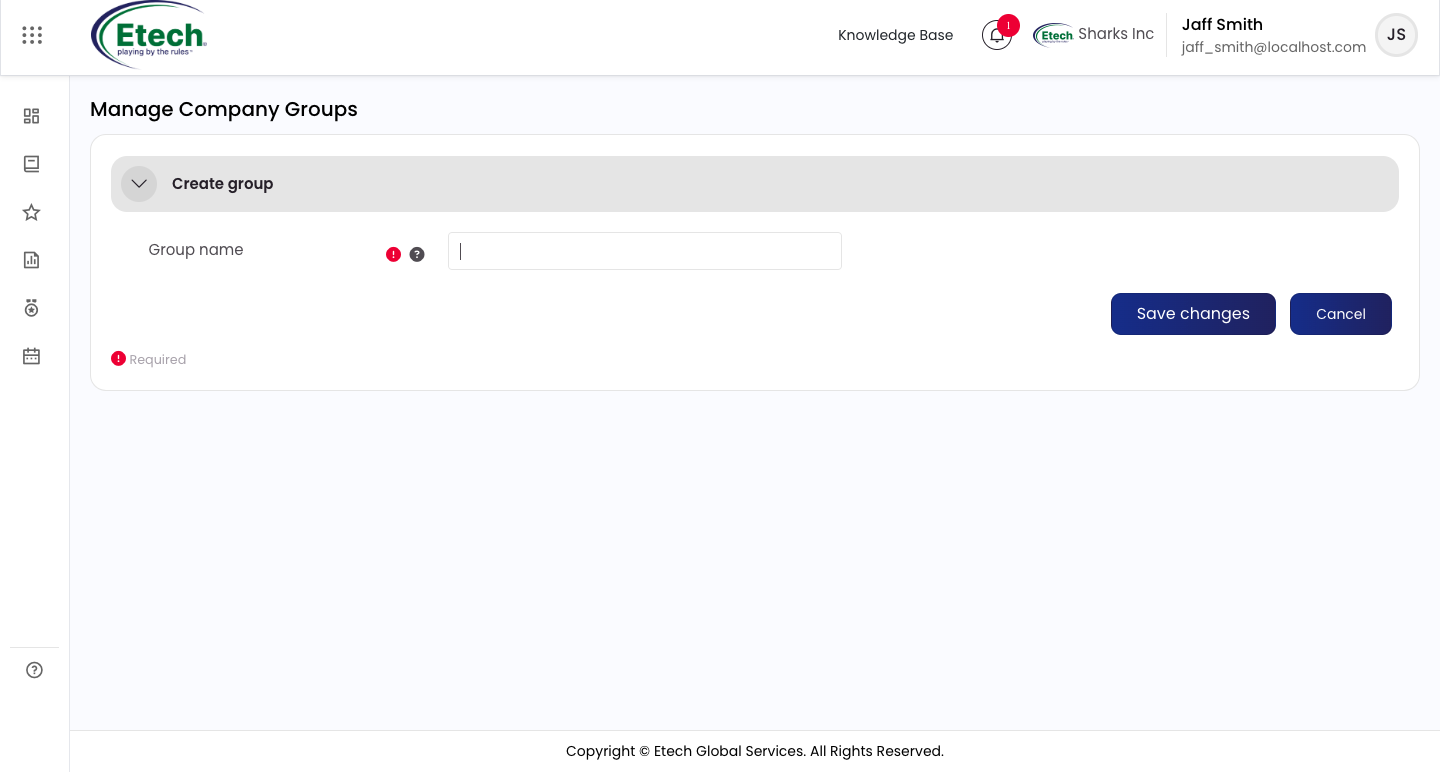
- Edit group : select a group using its radio button, then click Edit group to rename it
- Delete group : select a group using its radio button, then click Delete group to remove it
Groups are course-specific. Always select the correct course before creating, editing, or deleting a group.
Assign Course Groups
Use this to place users from a specific department into a course group.
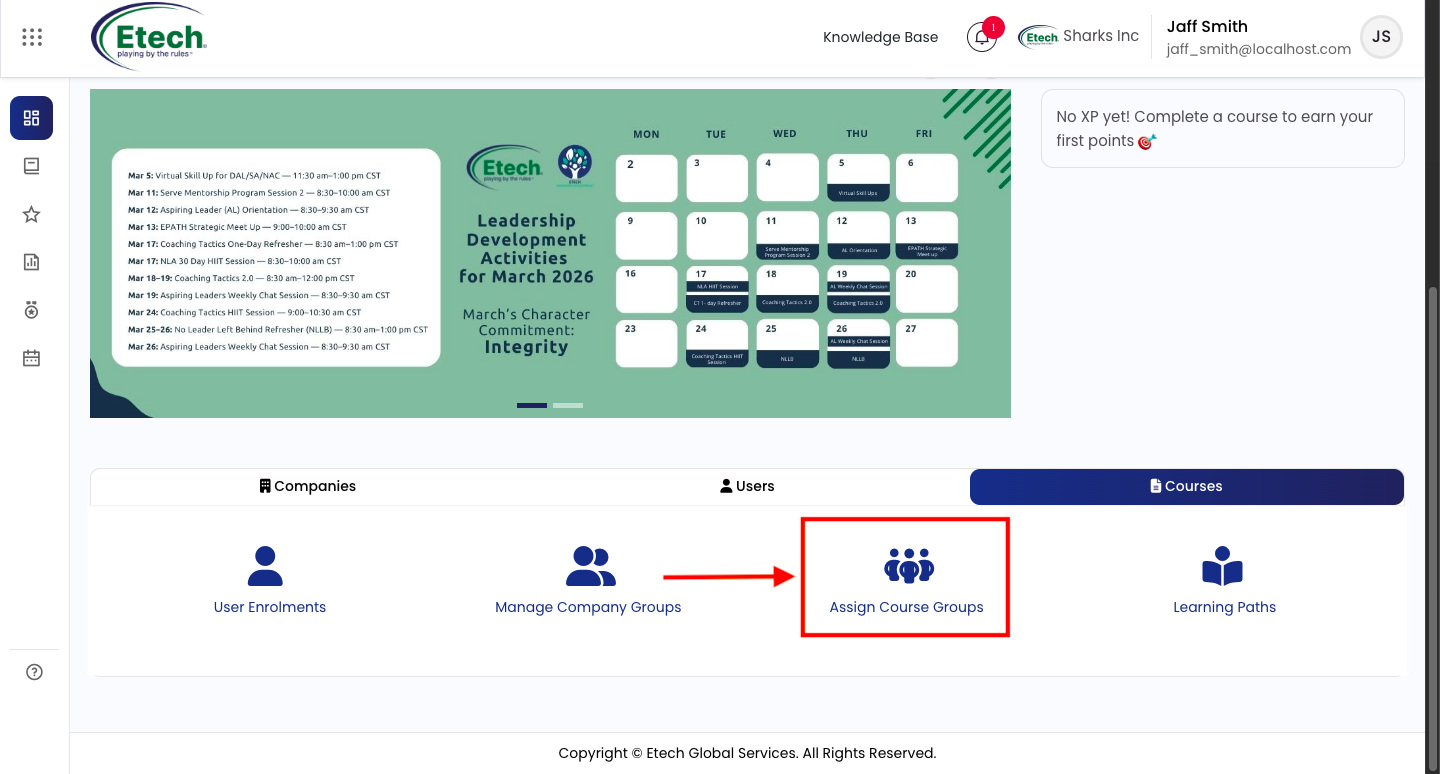
Step 1 : Select a course Use the Select course field and search for the course (e.g., Global course 1). The selected course will appear as a tag.
Step 2 : Select a group Under Manage course groups, use the Select group field to choose which group you want to assign users into (e.g., Course group for Sharks Inc).
Step 3 : Select a department The department tree is shown below. Use the dropdown to select the specific department or sub-department whose users you want to manage (e.g., Sharks Inc, Sharks Inc / Kelvin Research, Sharks Inc / SpaceK, Sharks Inc / Wells Scope).
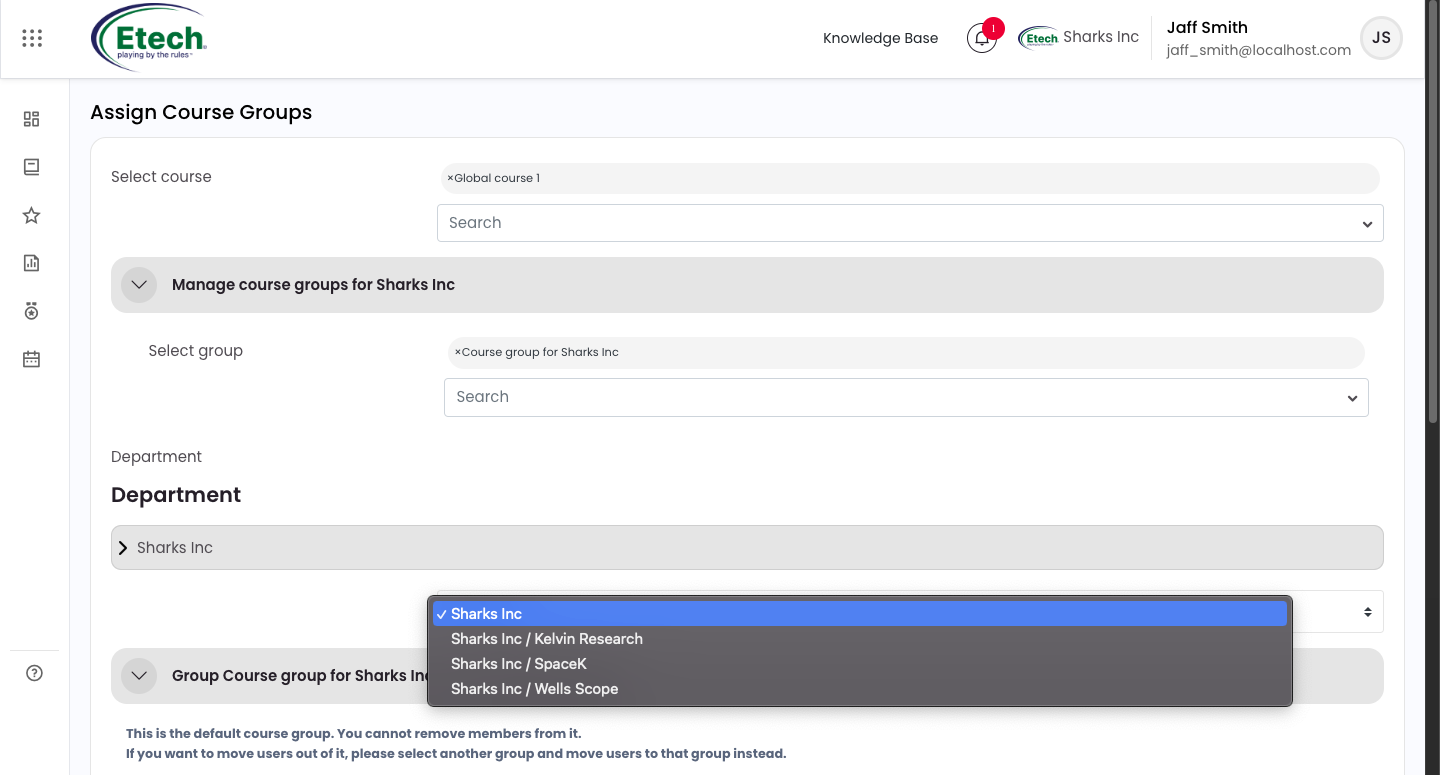
Once all three are selected, the group panel loads:
- Left panel : users currently in the selected group
- Right panel : potential users available to add (labelled by role, e.g., manager role)
- Both panels include a Search bar and a role filter dropdown
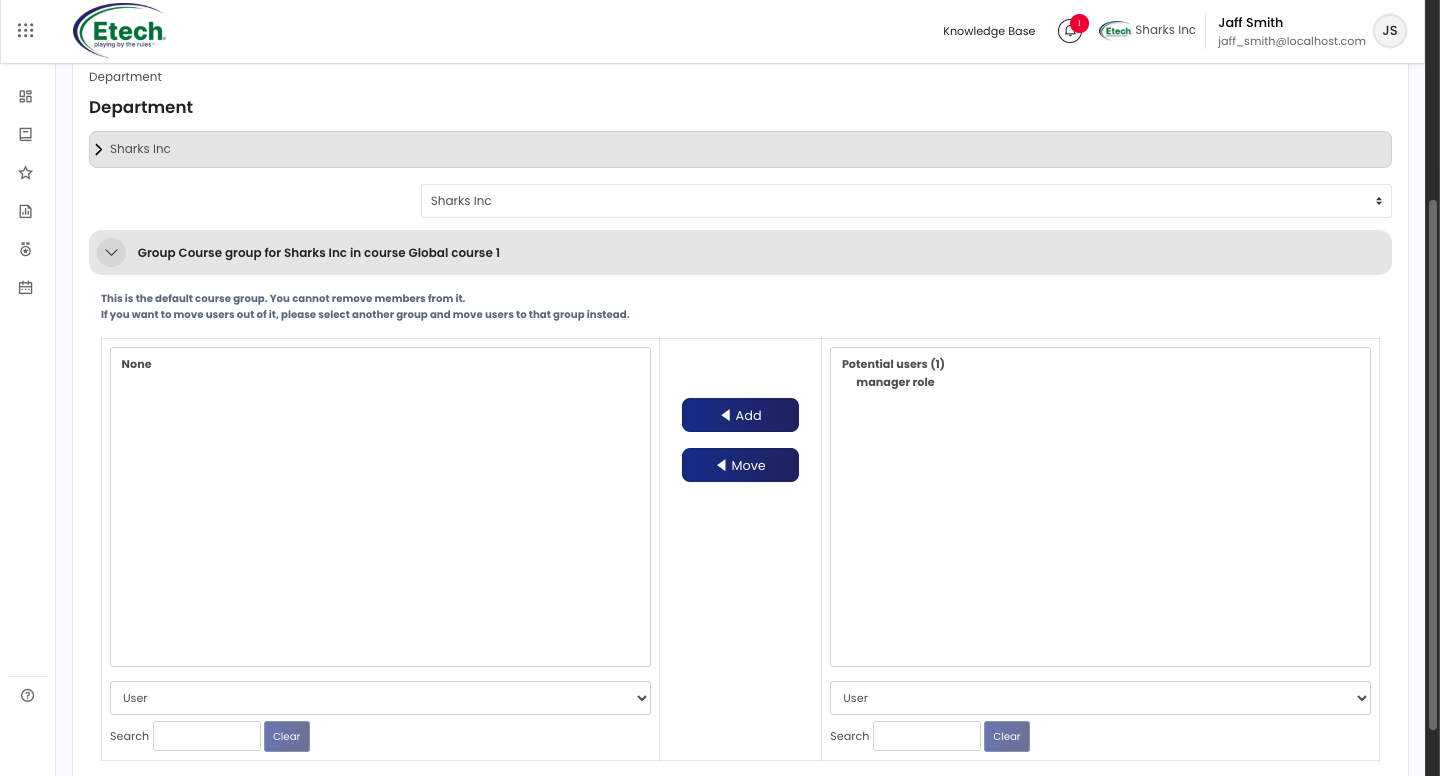
Action buttons:
- Add : moves selected user(s) from the right panel into the group
- Move : moves selected user(s) from one group to another within the same course
Important: If the panel header shows “This is the default course group. You cannot remove members from it.” users in this group cannot be removed directly. You must use Move to transfer them to a different group first.
Learning Paths
Use this to create structured sequences of courses that guide learners through a defined journey.
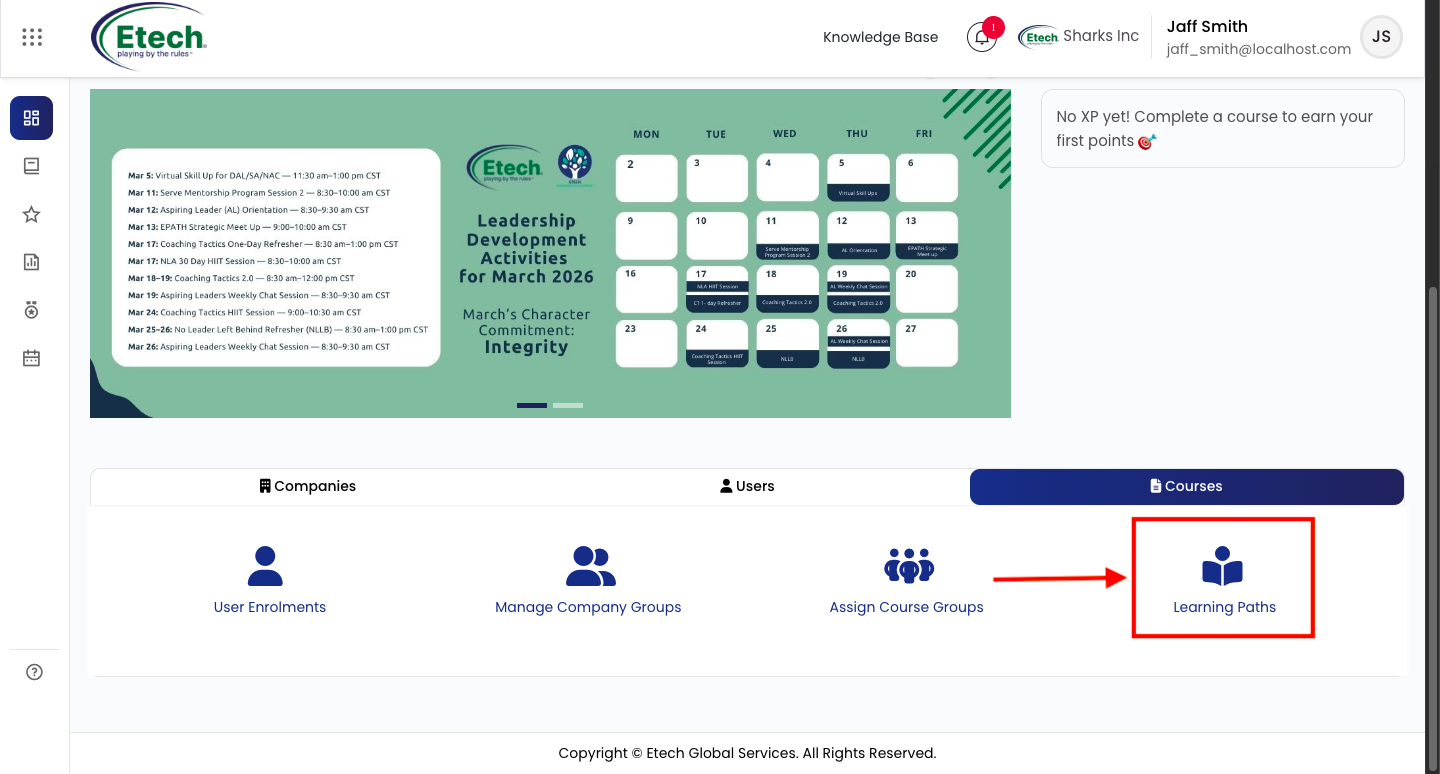 Creating a new Learning Path
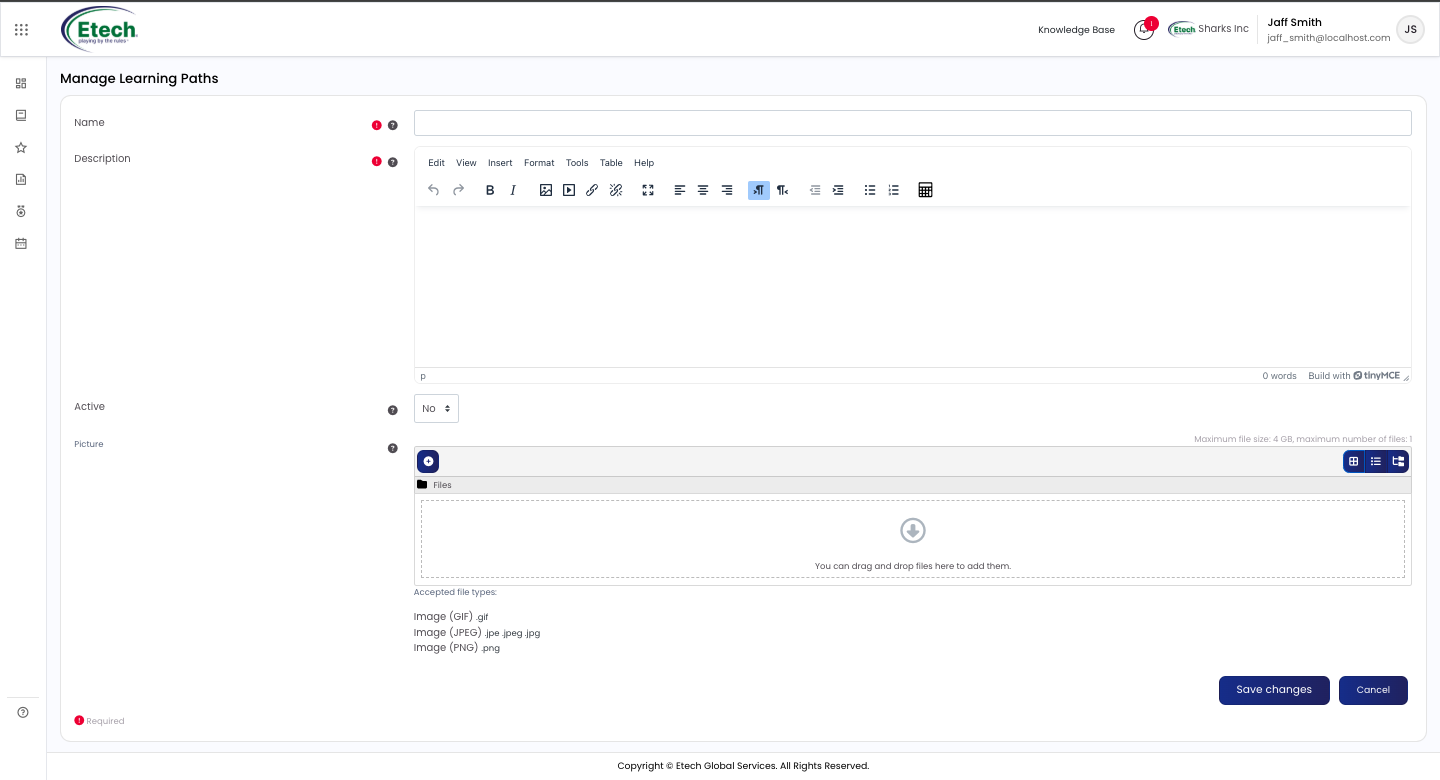
Click Learning Paths from the Courses tab, then click Add new path. The creation form includes:
- Name : Enter a clear, descriptive name for the learning path
- Description : Use the rich text editor to add a summary or instructions for learners. The editor supports formatting, images, links, and tables
- Active : set to Yes when the path is ready to be visible to learners. Leave as No while still building it
- Picture : optionally upload a cover image for the learning path. Accepted formats: GIF, JPEG (.jpe, .jpeg, .jpg), PNG. Maximum file size: 4 GB, maximum 1 file
Click Save changes to create the path, or Cancel to discard.
After saving, the following actions become available on the learning path:
- Make available / unavailable : controls whether learners can see and access the path
- Edit course list : add or remove courses from the path and set whether course sets are sequential (must be completed in order) or non-sequential (can be done in any order)
- Edit path : update the name, description, active status, or picture
- Assign students : assign specific learners or groups to the learning path
- Duplicate : creates a copy of the path which can then be modified independently
- Delete : permanently removes the learning path
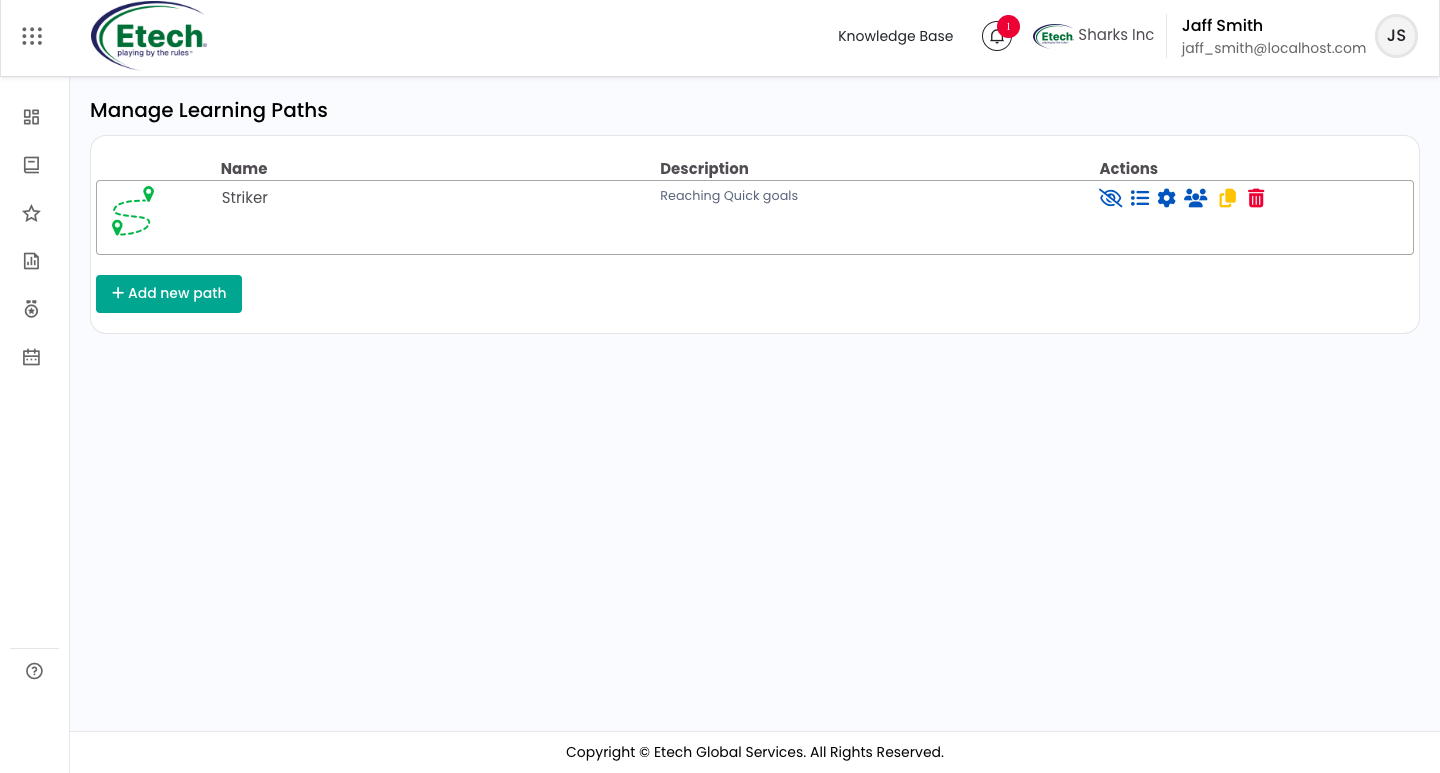
Set Active to No while building or editing a path so learners do not see an incomplete version.
Summary
The Company Manager role serves as the central point of control for managing the learning environment within EtechRU. From configuring the company structure and branding, to creating users and managing their course access, to building structured learning journeys, every aspect of the platform falls within the Company Manager’s scope.
Effective use of this role begins with a well-defined company setup: departments created before users are assigned, licenses verified before enrollments are made, and email templates and profile fields configured to reflect the organisation’s structure. From there, the Users and Courses tabs provide the tools needed to keep learners organized, progressing, and reportable at any time.
As you work within the platform, always confirm the active company context shown in the top-right selector. Every action performed, whether creating a user, enrolling a course, or configuring a template, applies directly to that company, making accuracy in navigation as important as the actions themselves.

Video